Rest (Basic Auth)/ Rest (OAuth 2.0)
Setup
The Rest data source allows you to connect to Rest-based APIs. Cast offers two authentication methods: Basic Auth and OAuth 2.0.
Rest (Basic Auth) Configuration
When setting up a Rest API with Basic Authentication, the following fields are required:
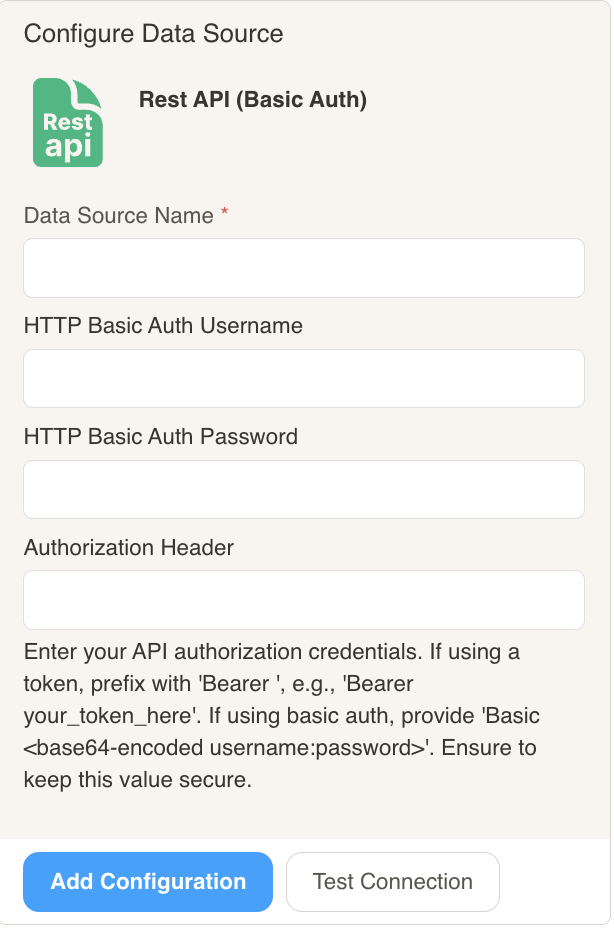
Data Source Name: A unique name to identify this connection in your datasets
HTTP Basic Auth Username: The username for the API’s basic authentication
HTTP Basic Auth Password: The password for the API’s basic authentication
Authorization Header: Custom authorization header format (if required by the API)
Rest (OAuth 2.0) Configuration
For APIs that use OAuth 2.0 authentication, you’ll need to provide:
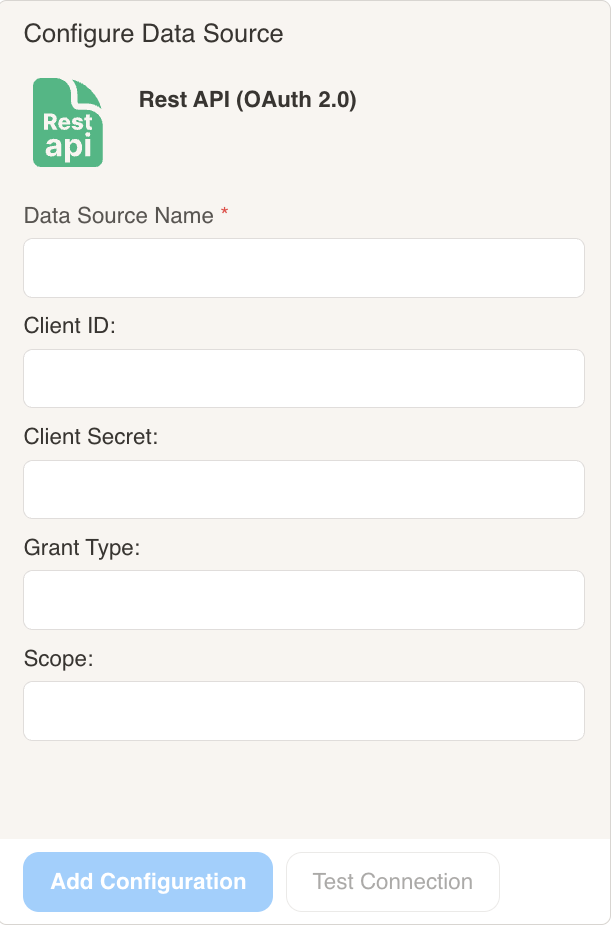
Data Source Name: A unique name to identify this connection (required)
Client ID: The OAuth client ID provided by the API service
Client Secret: The OAuth client secret provided by the API service
Grant Type: The OAuth grant type (e.g., authorization_code, client_credentials, password)
Scope: The scope of access you’re requesting from the API (space-separated list)
Connection Testing
After configuring your data source, you can use the “Test Connection” button to verify that Cast can successfully connect to your Rest API with the provided credentials.
Creating a Rest Datasource
Creating Datasets from a Rest API Datasource
Once you have added a Rest API data source, you can create one or more datasets that use it. Each dataset is defined by a small JSON query that tells Cast which endpoint to call and which parameters to send.
- Navigate to the Datasets screen in Cast.app designer by clicking on Home at the top of the screen and selecting Datasets.
- Click on Add New Dataset.
- Select the Rest API data source you created earlier (e.g. Caddy Report Data) instead of adding a new data source.
- Enter a dataset name (for example, Summary) and paste the JSON query in the query field.
- Click Run to verify the response, then click Save.
JSON Query Format
The JSON query for a Rest API dataset is a flat object. The only key Cast requires is url. Every other key/value pair you add is sent to the endpoint as a request parameter, so you can use the same data source to drive multiple datasets simply by varying these keys.
| Key | Required | Description |
|---|---|---|
url | Yes | The full URL of the Rest API endpoint you want to query. Authentication (Basic Auth or OAuth 2.0) is taken from the data source. |
| (any additional key) | Varies | Passed through to the endpoint as a request parameter. Use these to select which dataset to return, filter by date, scope to an organization, etc. Required vs. optional keys depend on your endpoint. |
Cast does not parse or interpret the extra keys — they are forwarded to your endpoint exactly as written. Refer to the documentation for the endpoint you are calling to know which keys are required and which are optional.
Example: Summary Dataset
The example below queries a reporting endpoint and asks for the summary dataset for a specific organization. month is an optional filter that the endpoint accepts; leaving it out returns the full range.
{
  "url": "https://api.example.com/reports",
  "dataset": "summary",
  "organization_id": "YOUR_ORGANIZATION_ID",
  "month": "2026-05"
}
To create a different dataset from the same data source, change the dataset value (for example to monthly_trend) and adjust any endpoint-specific parameters:
{
  "url": "https://api.example.com/reports",
  "dataset": "monthly_trend",
  "organization_id": "YOUR_ORGANIZATION_ID"
}
After running the query, Cast shows a preview of the rows returned. If the preview looks correct, give the dataset a name and click Save.
Transforming the Response
If you need to reshape the response — rename columns, pivot, join with another dataset, or clean up values — create a follow-up dataset using Query Datasets. Query Datasets let you run SQL against any existing dataset, including the raw JSON dataset you just created.