SVG Conditional Highlights
Dynamically show, hide, or conditionally display specific elements within SVG graphics based on personalized data. This feature enables highly personalized visual content that adapts to individual recipient data.
How It Works
The system automatically detects highlightable elements in your SVG files by scanning for element IDs with specific prefixes:
lc_- Liquid Content identifiershid_- Highlight identifiers
When you upload an SVG file to a personalized graphic scene, the system automatically detects available highlights and makes them available in the narration editor.
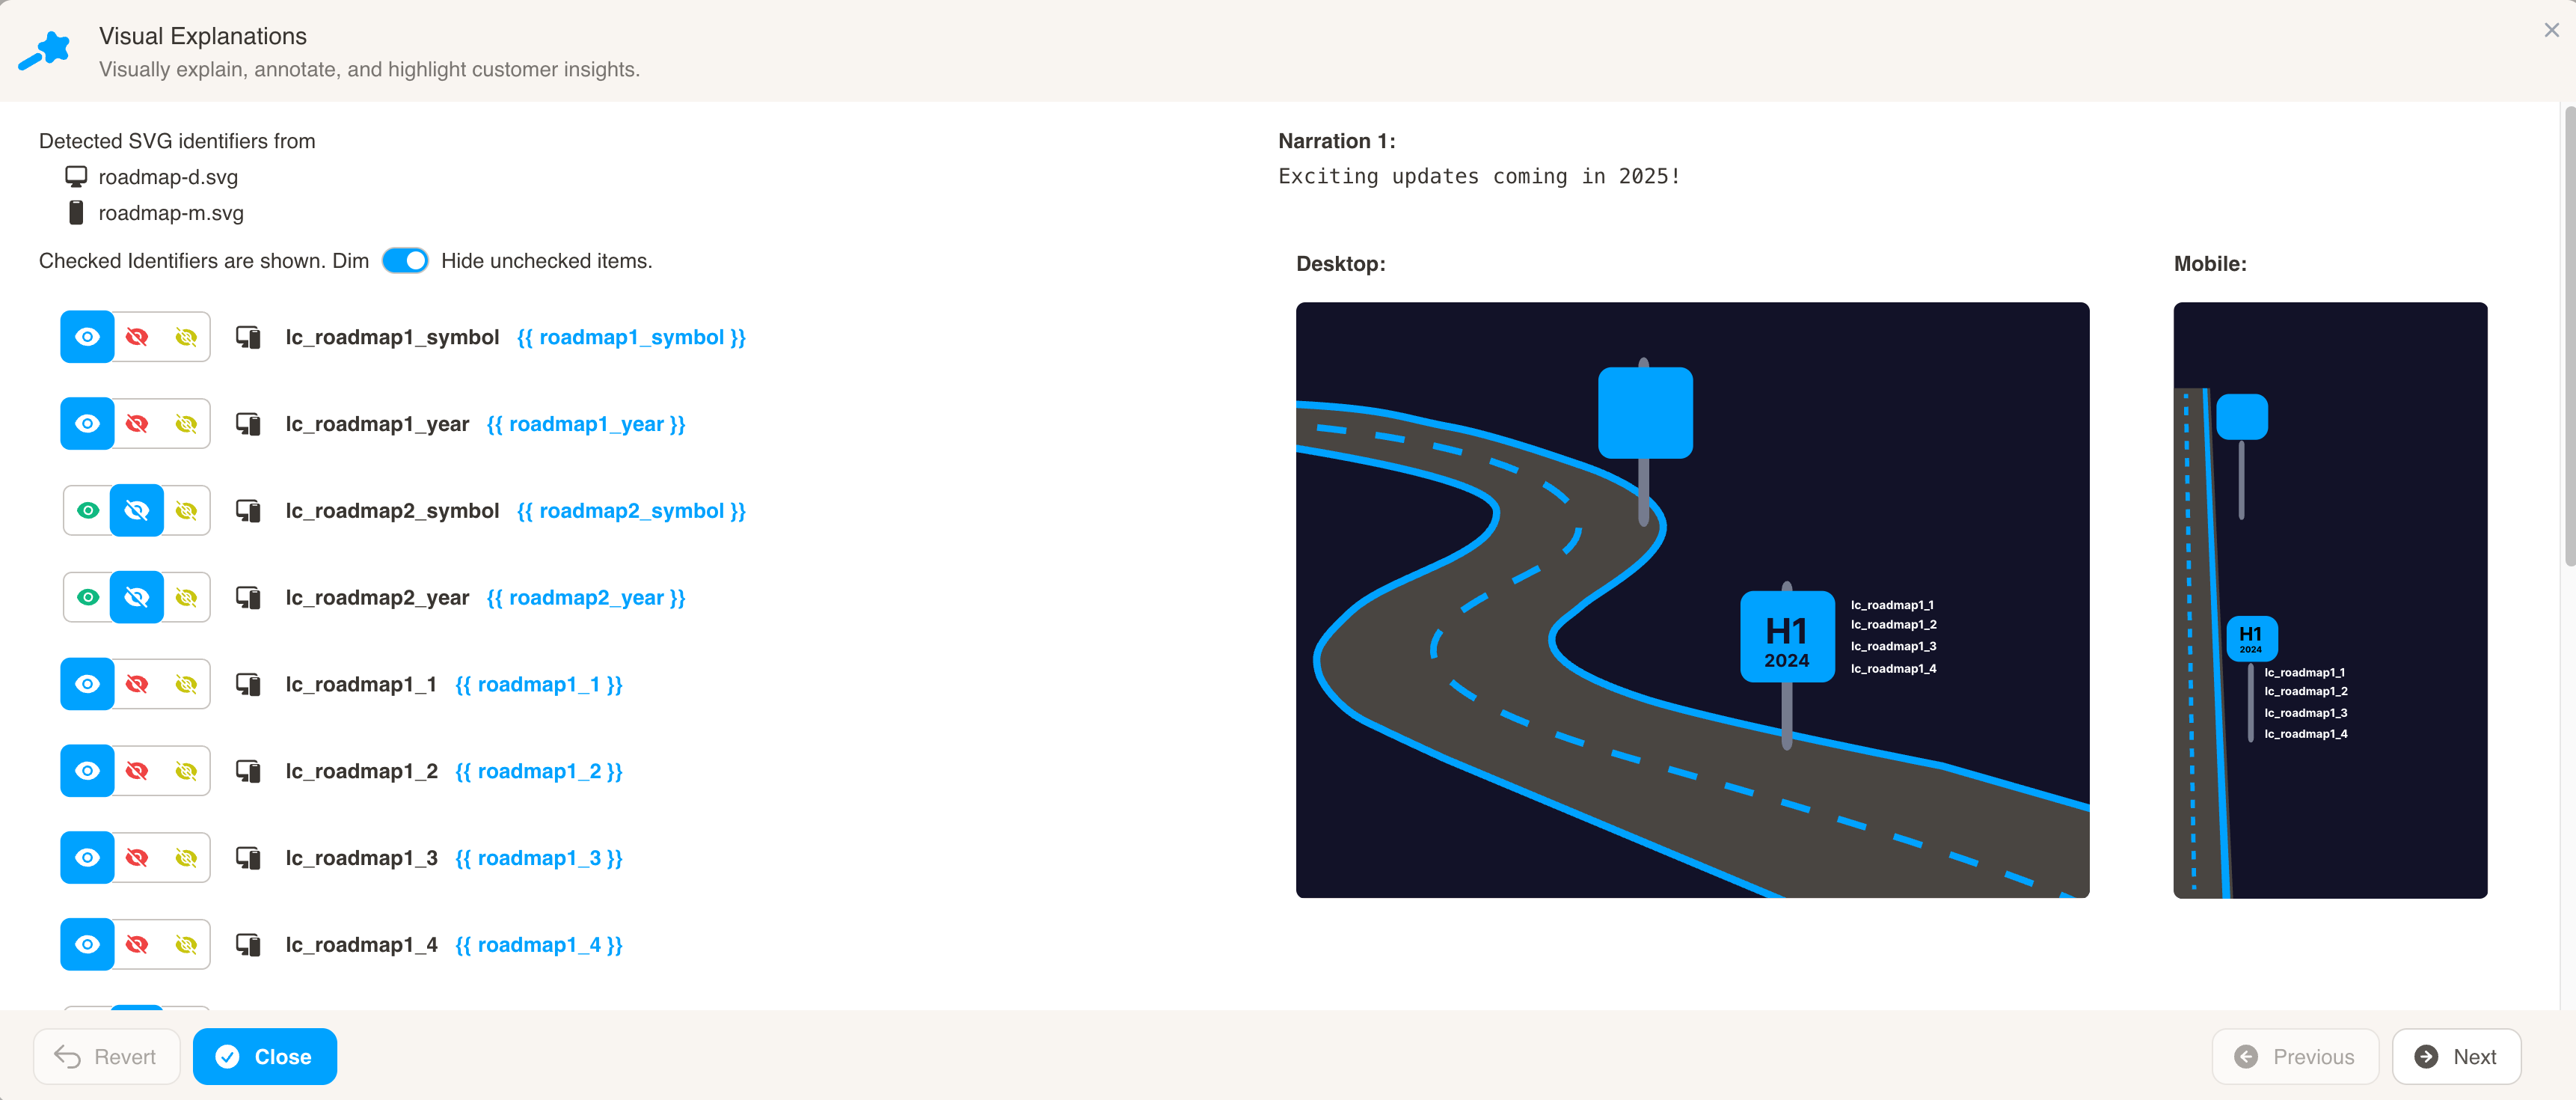
Set Visibility States
For each highlight, choose one of three visibility states:
- Show (green eye icon) - Always visible
- Hide (red eye slash icon) - Always hidden
- Conditional (yellow dotted eye icon) - Visibility based on condition
Basic Examples
Simple comparison:
{% if contact.revenue > 100000 %}true{% else %}false{% endif %}
Equality check:
{% if contact.status == "Premium" %}true{% else %}false{% endif %}
Multiple conditions:
{% if contact.score >= 80 and contact.region == "North" %}true{% else %}false{% endif %}
Condition Validation
The system validates that conditions evaluate to exactly "true" or "false" (string).
Error Example:
low
❌ Error: “Invalid condition, should be true or false”
Correct Version:
false
Bulk Operations
The bulk operations feature allows you to efficiently manage multiple highlights at once.
Accessing Bulk Mode
- Open a Visual Explanation of any SVG slide
- Click “Select All” to enable bulk operations
- Checkboxes appear next to each highlight - you can unselect individual items if needed
- Use the toggle to set the desired state (Show/Hide/Conditional)
- Click “Apply” to apply the changes to all selected highlights
- Conditional Narrations - Conditional narrative content
- Conditional Presentations - Conditional slide visibility
- Liquid Syntax Reference - Complete Liquid template guide