
Getting Started
Getting Started with Knowledge Base
Section titled “Getting Started with Knowledge Base”This guide will walk you through creating your first knowledge document and attaching it to an AI agent in about 5-10 minutes.
What You’ll Learn
Section titled “What You’ll Learn”By the end of this guide, you’ll have:
- Created your first knowledge document
- Monitored the processing status
- Attached the document to an AI agent
- Tested the agent with knowledge-based questions
Prerequisites
Section titled “Prerequisites”- Access to Cast.app with Knowledge Base enabled
- Custom Agent added - Go to Ask Me Anything section and click Add Custom Agent
- Agent ID configured - Contact support@cast.app to set up your agent ID (the Knowledge Base Documents section will appear after this is configured)
- A URL, file, or text content to use as your knowledge source
Step 1: Access Knowledge Base
Section titled “Step 1: Access Knowledge Base”- Click the book icon in the top navigation bar
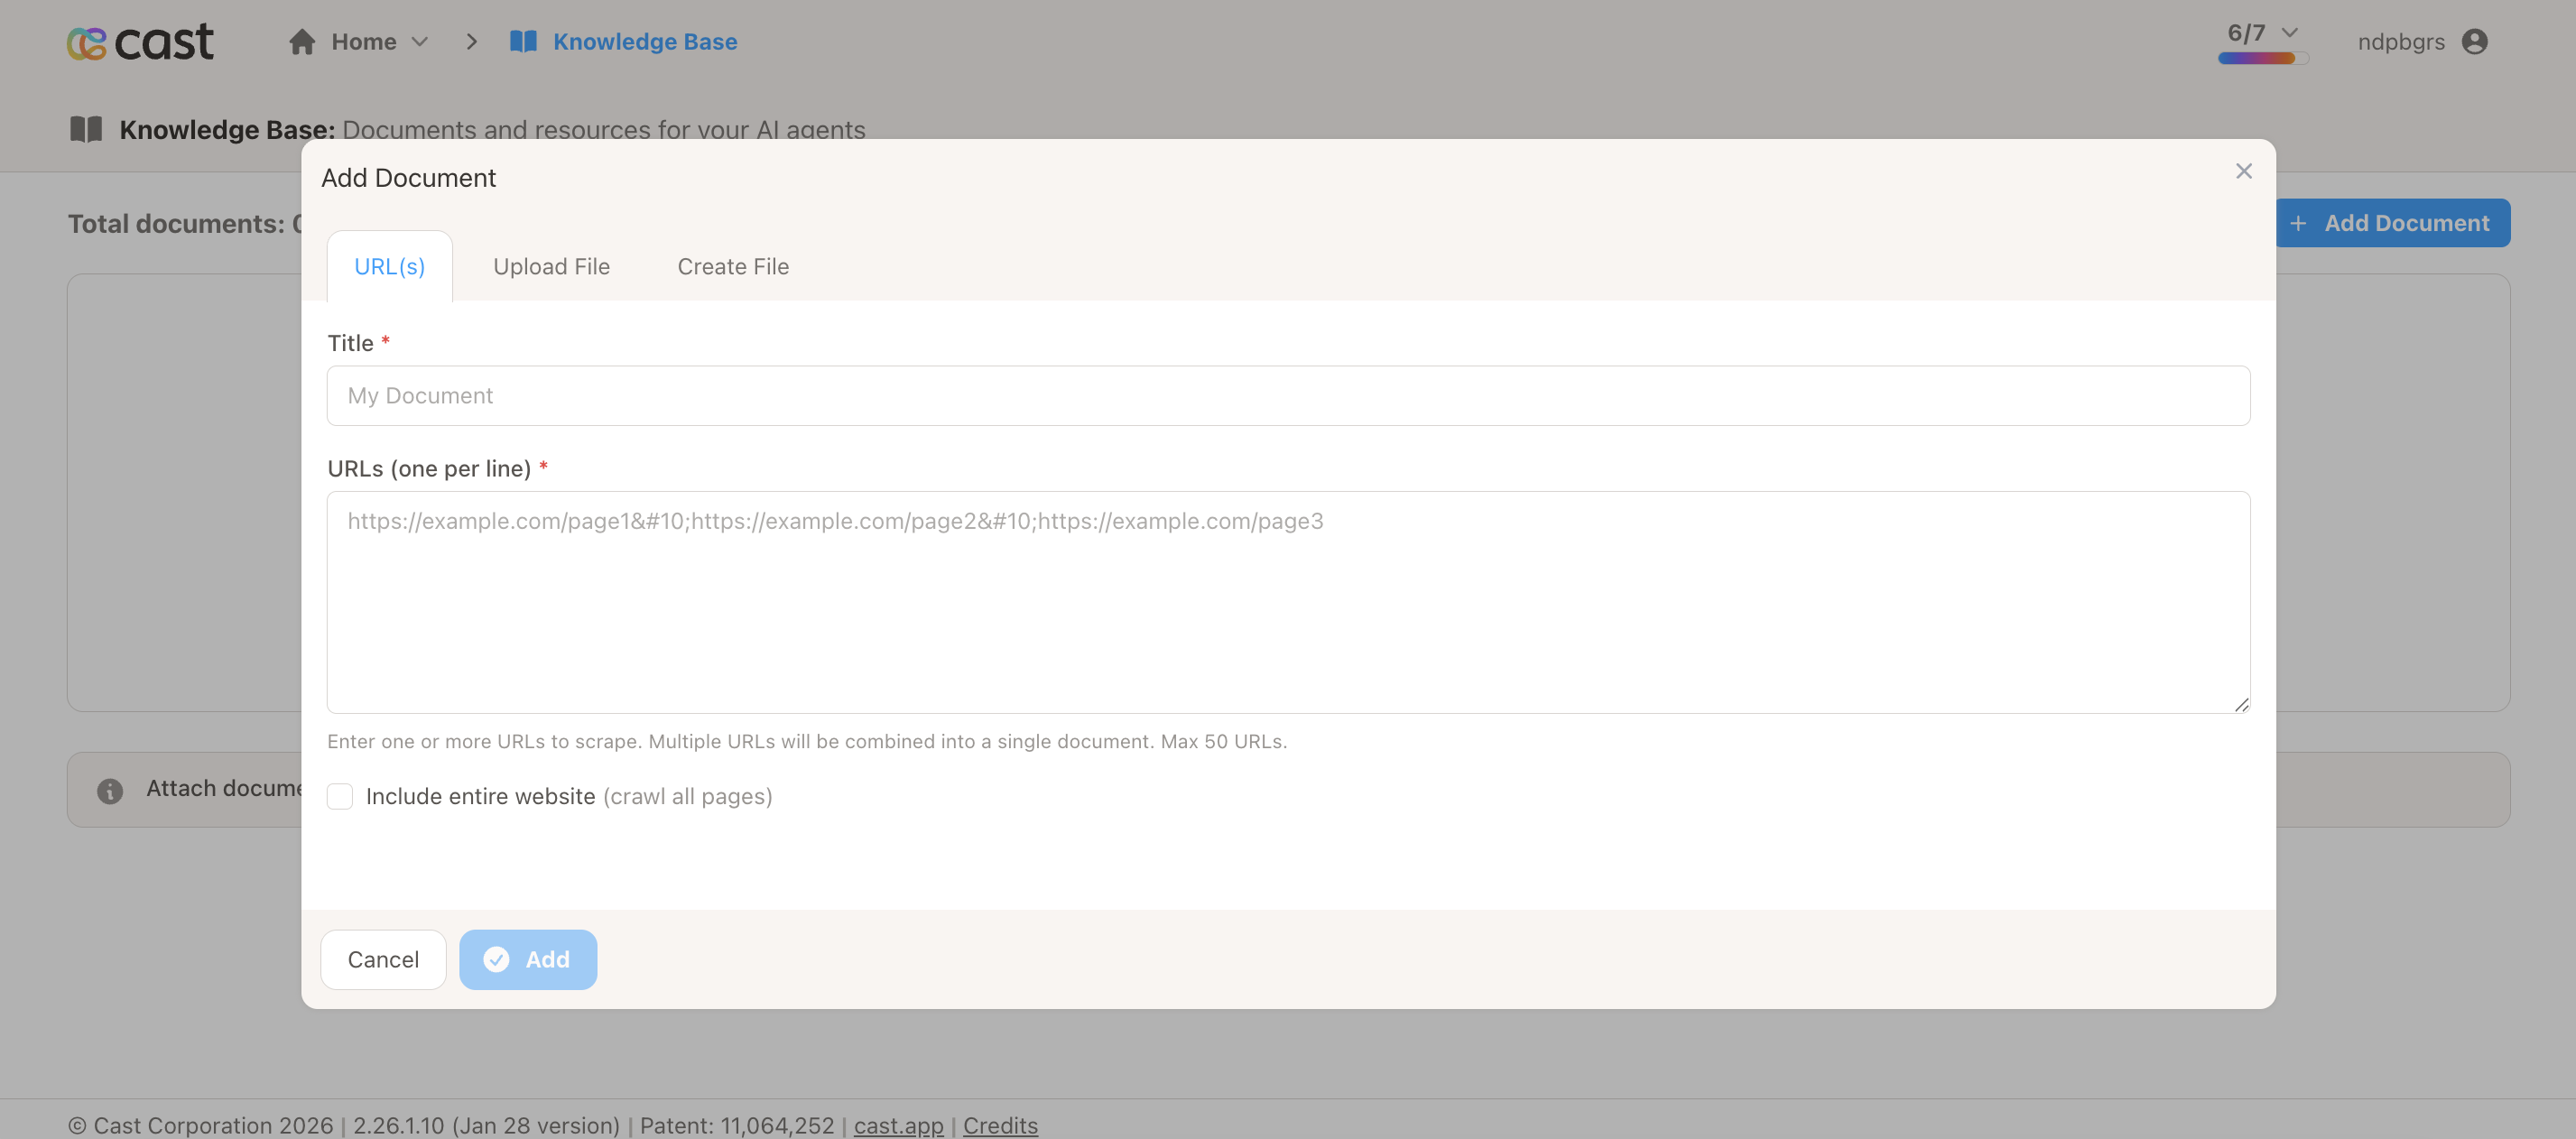
- You’ll see the Knowledge Base page with four tabs: URL, Crawl, File, Text
Step 2: Create Your First Document
Section titled “Step 2: Create Your First Document”Choose the method that best fits your content:
Option A: From a URL (Recommended for first time)
Section titled “Option A: From a URL (Recommended for first time)”This is the quickest way to get started if you have a webpage you want to use.
Steps:
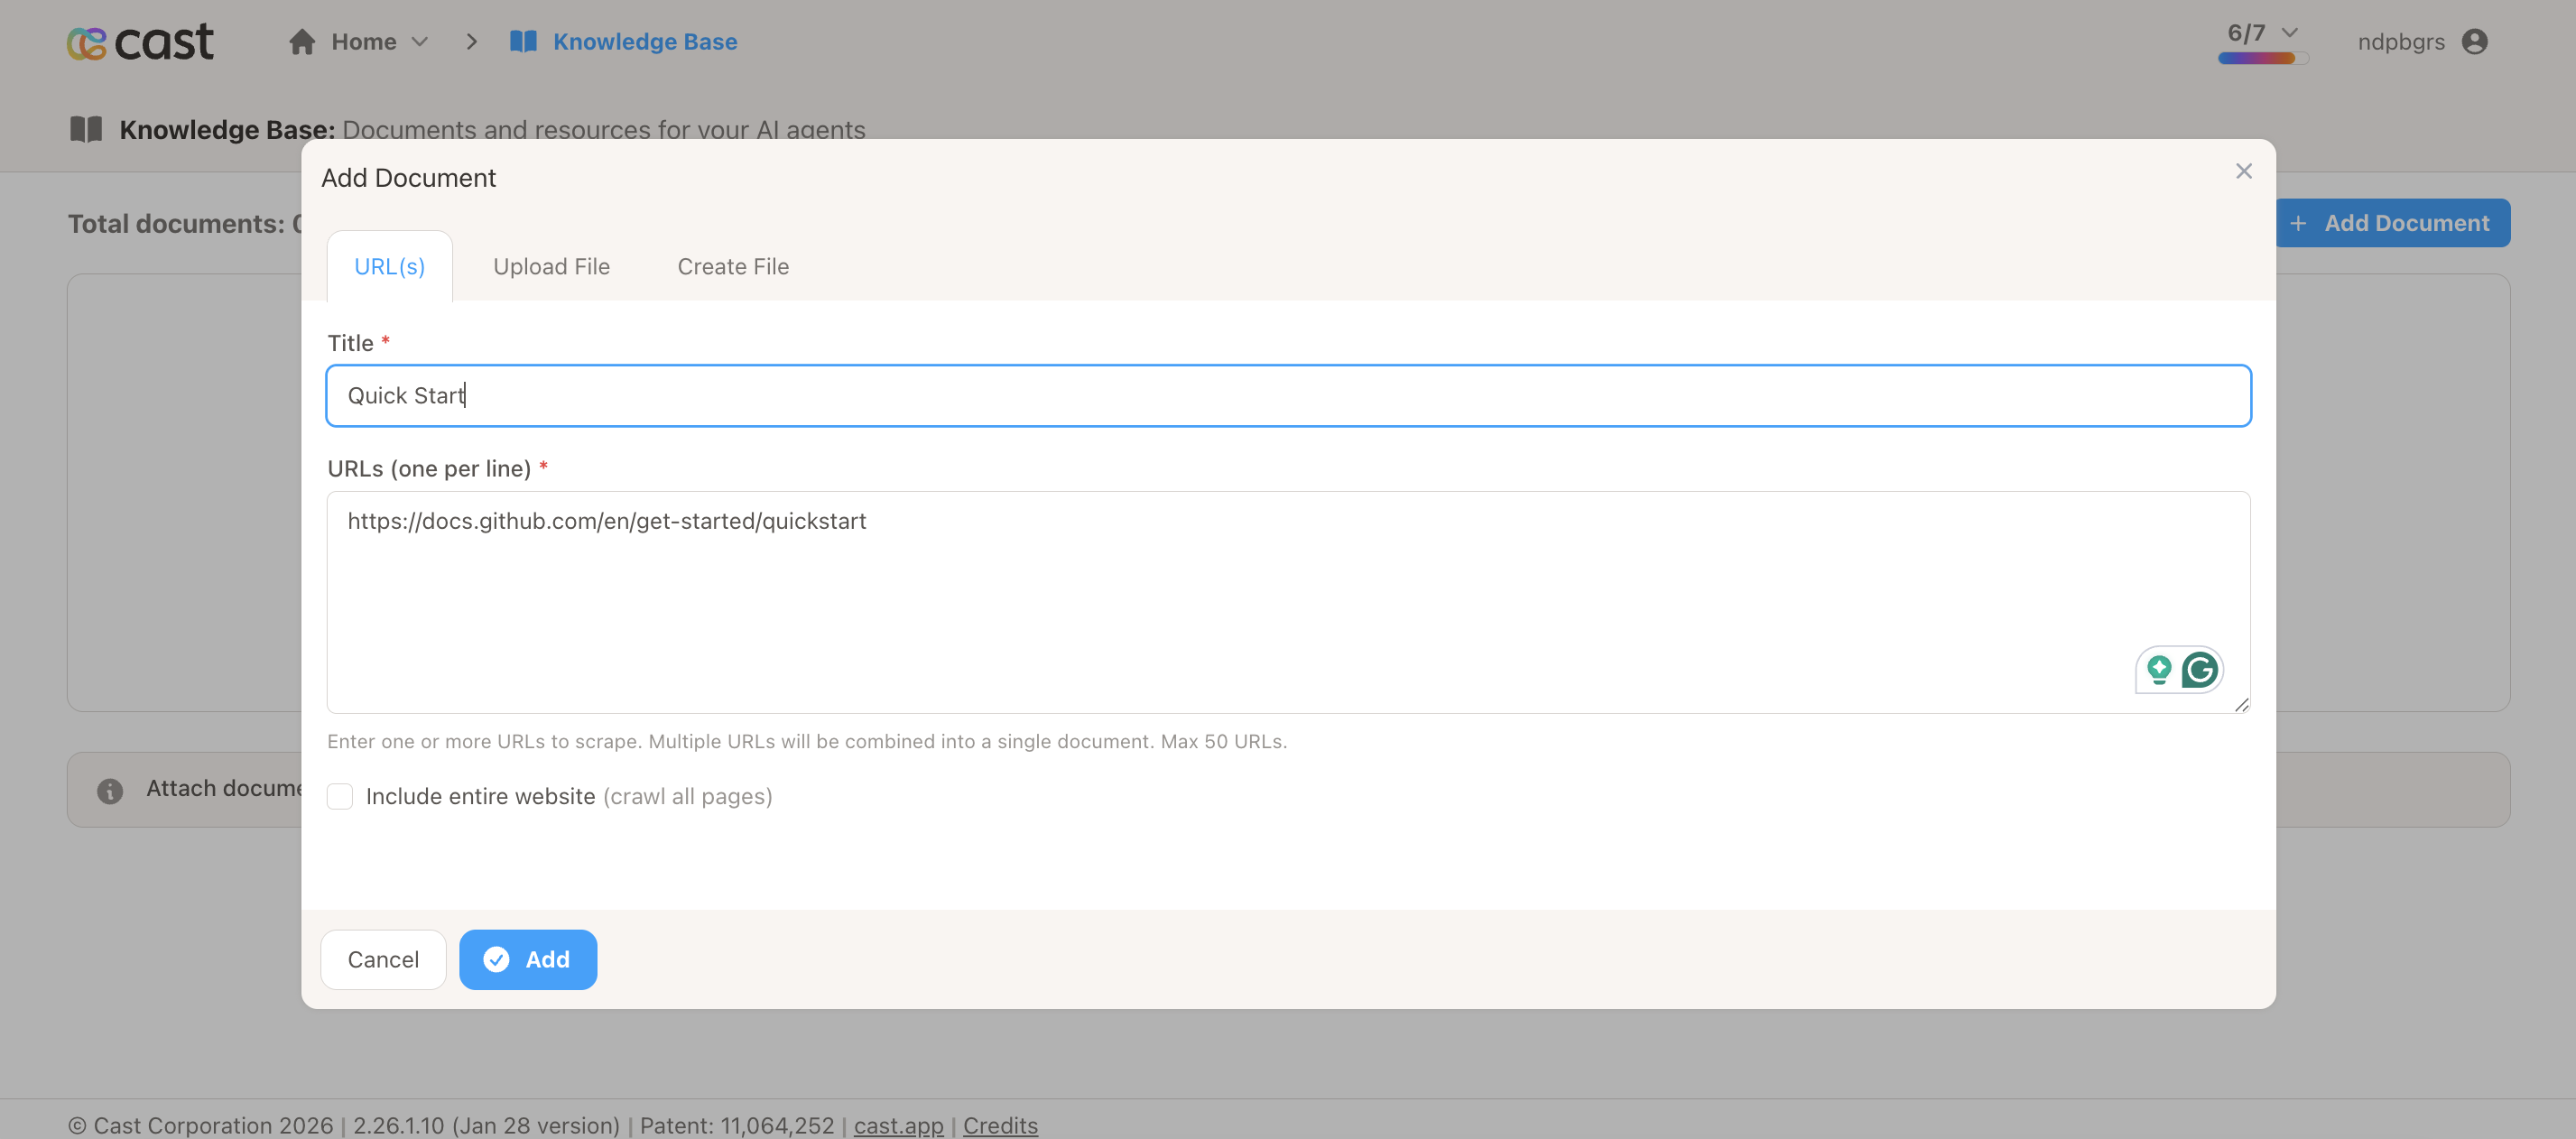
- Click the URL tab
- Enter a URL (example:
https://docs.github.com/en/get-started/quickstart) - Click Add URL
- Processing will begin automatically
Option B: Inline Text (Fastest)
Section titled “Option B: Inline Text (Fastest)”Best for quick FAQs or content you already have written.
Steps:
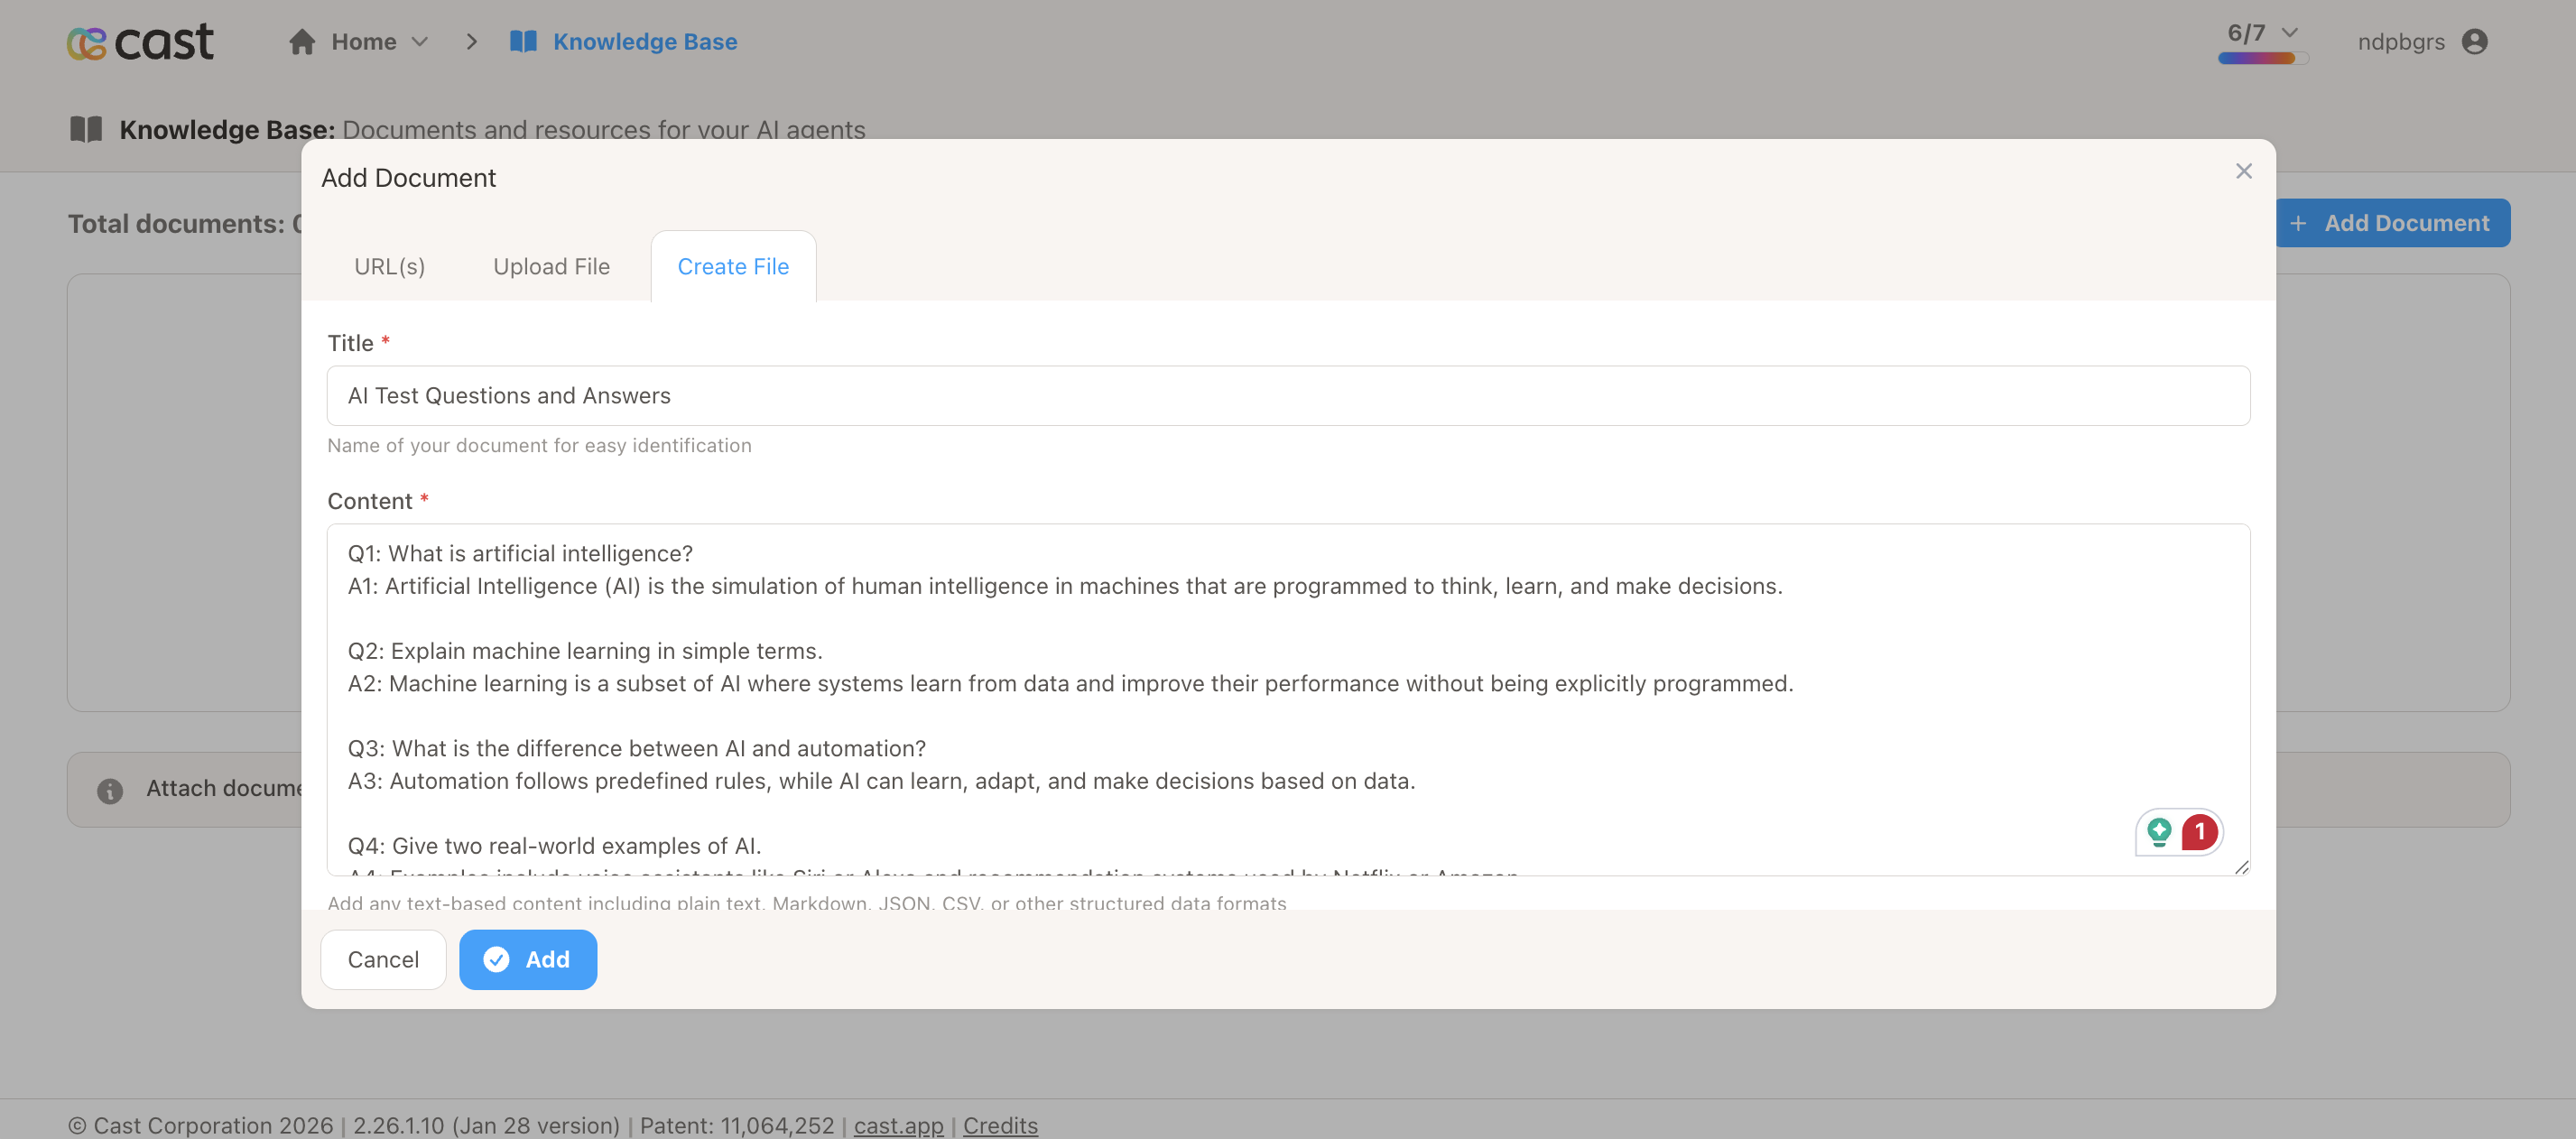
- Click the Text tab
- Enter a Title for your document
- Paste or type your content in the text area
- Click Add Text
Example content:
Q: What is Cast?A: Cast is a video communication platform for creating personalized content.
Q: How much does it cost?A: Plans start at $49/month. Contact sales for enterprise pricing.
Q: Do you offer a free trial?A: Yes, 14-day free trial available on all plans.
Option C: File Upload
Section titled “Option C: File Upload”If you have an existing document to upload.
Steps:
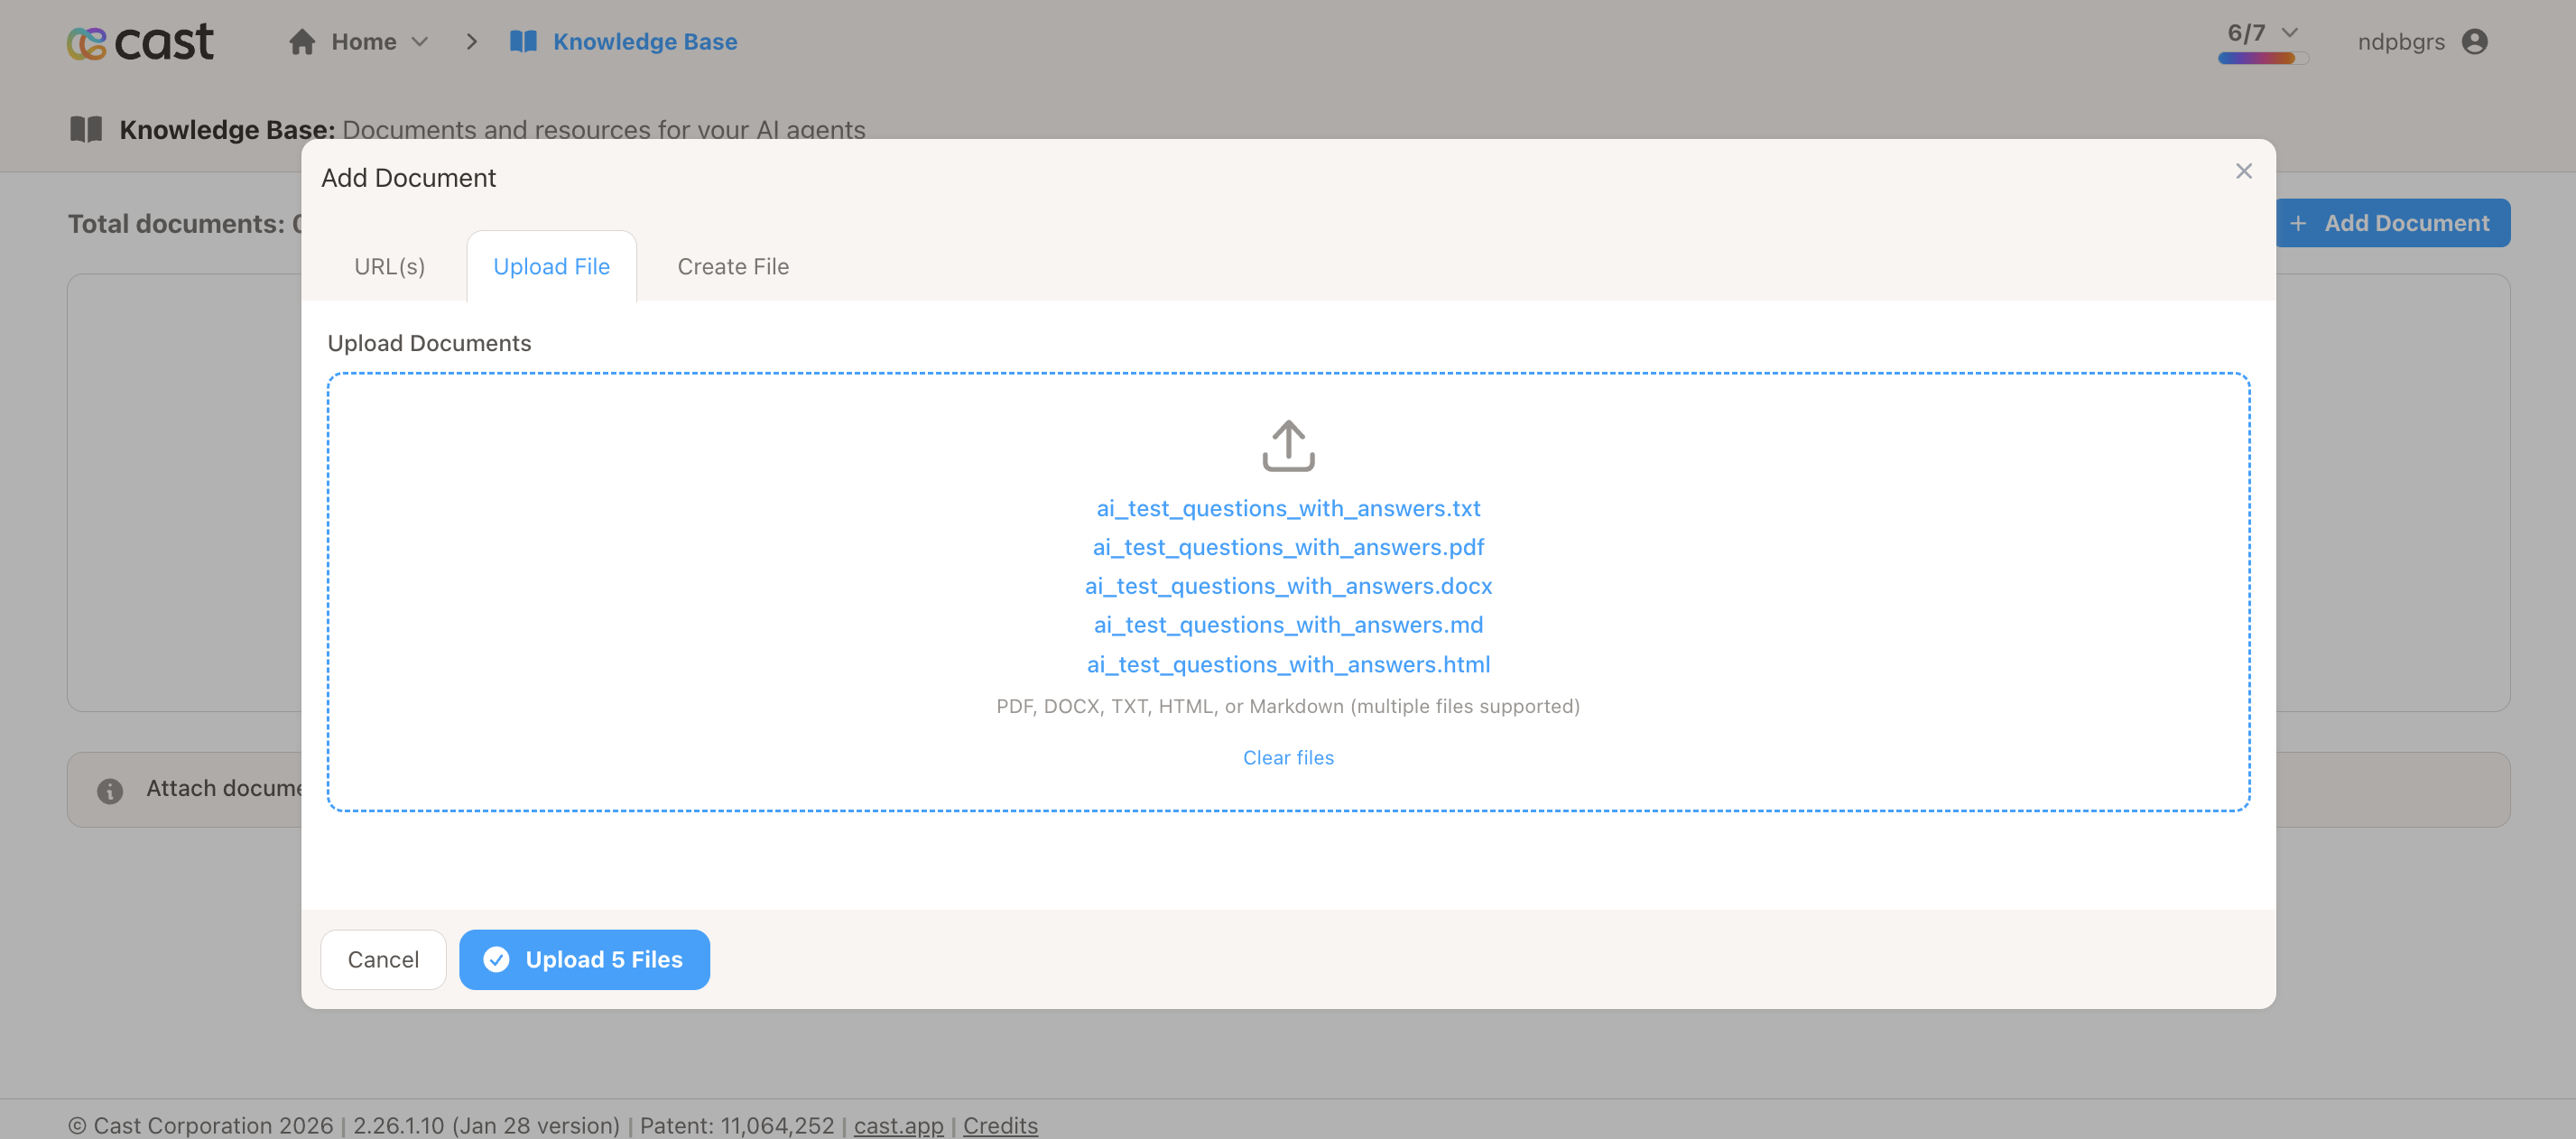
- Click the File tab
- Click Choose file or drag and drop your file
- Select your file
- Click Upload File
Supports PDF, Markdown, Plain Text, HTML, CSV, and JSON files up to 10 MB. See Document Types for complete format details.
Option D: Website Crawl
Section titled “Option D: Website Crawl”For scraping multiple related pages from a website.
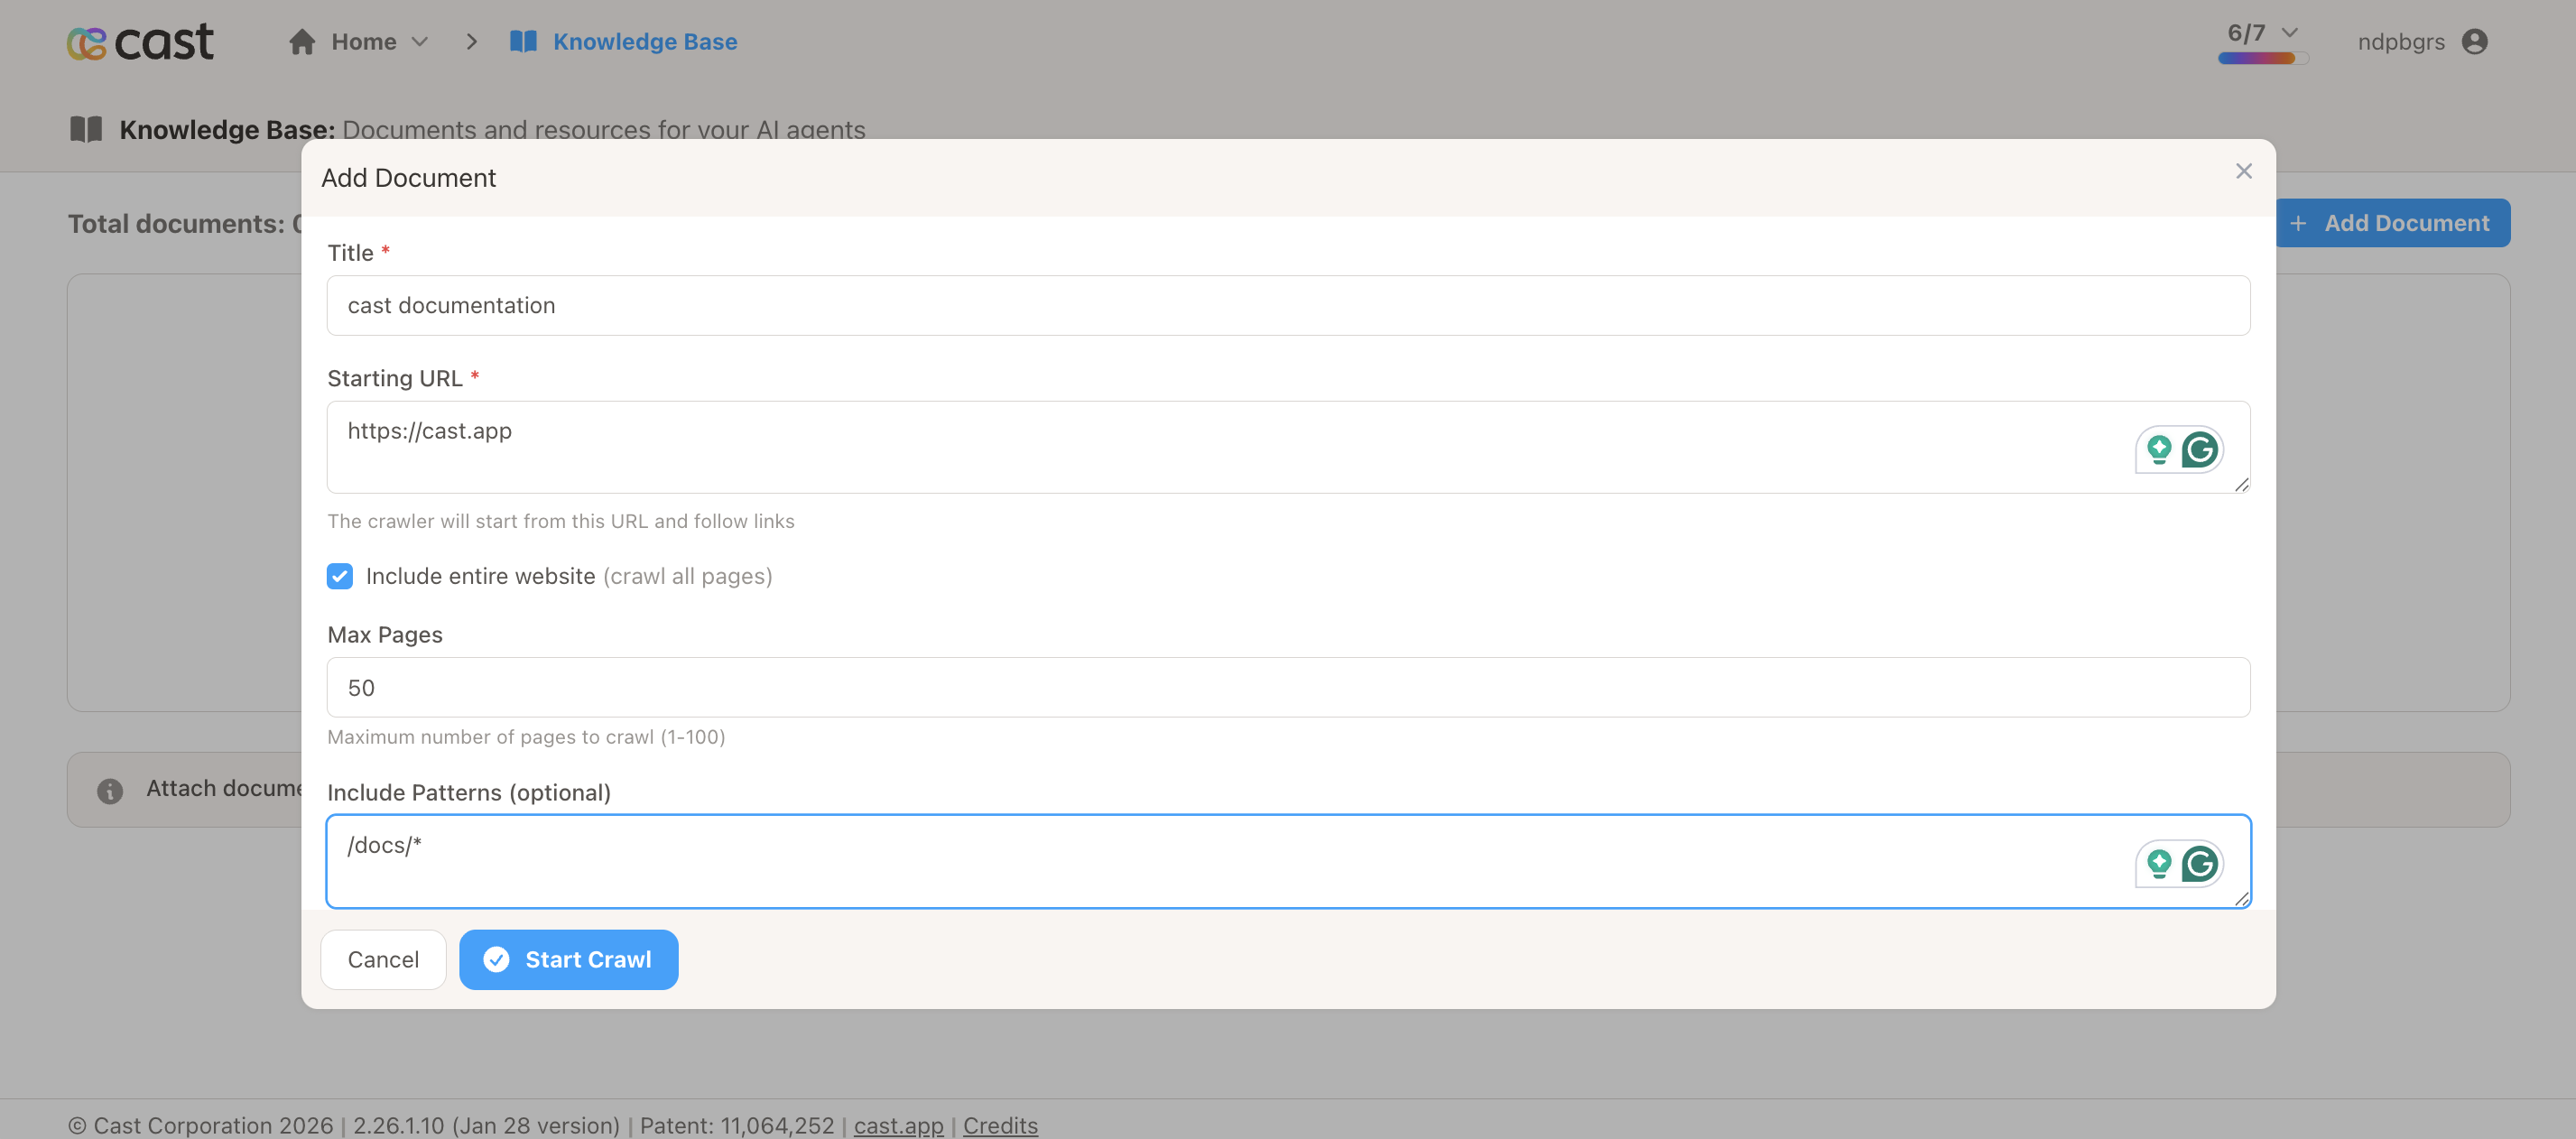
Steps:
- Click the Crawl tab
- Enter the Base URL
- Set Max Pages (recommended: start with 5-10)
- (Optional) Add Include Patterns (e.g.,
/docs/*,/guides/*) - (Optional) Add Exclude Patterns (e.g.,
/api/*,*.pdf) - Click Start Crawl
Step 3: Monitor Processing Status
Section titled “Step 3: Monitor Processing Status”After creating a document, watch the status badge update automatically:
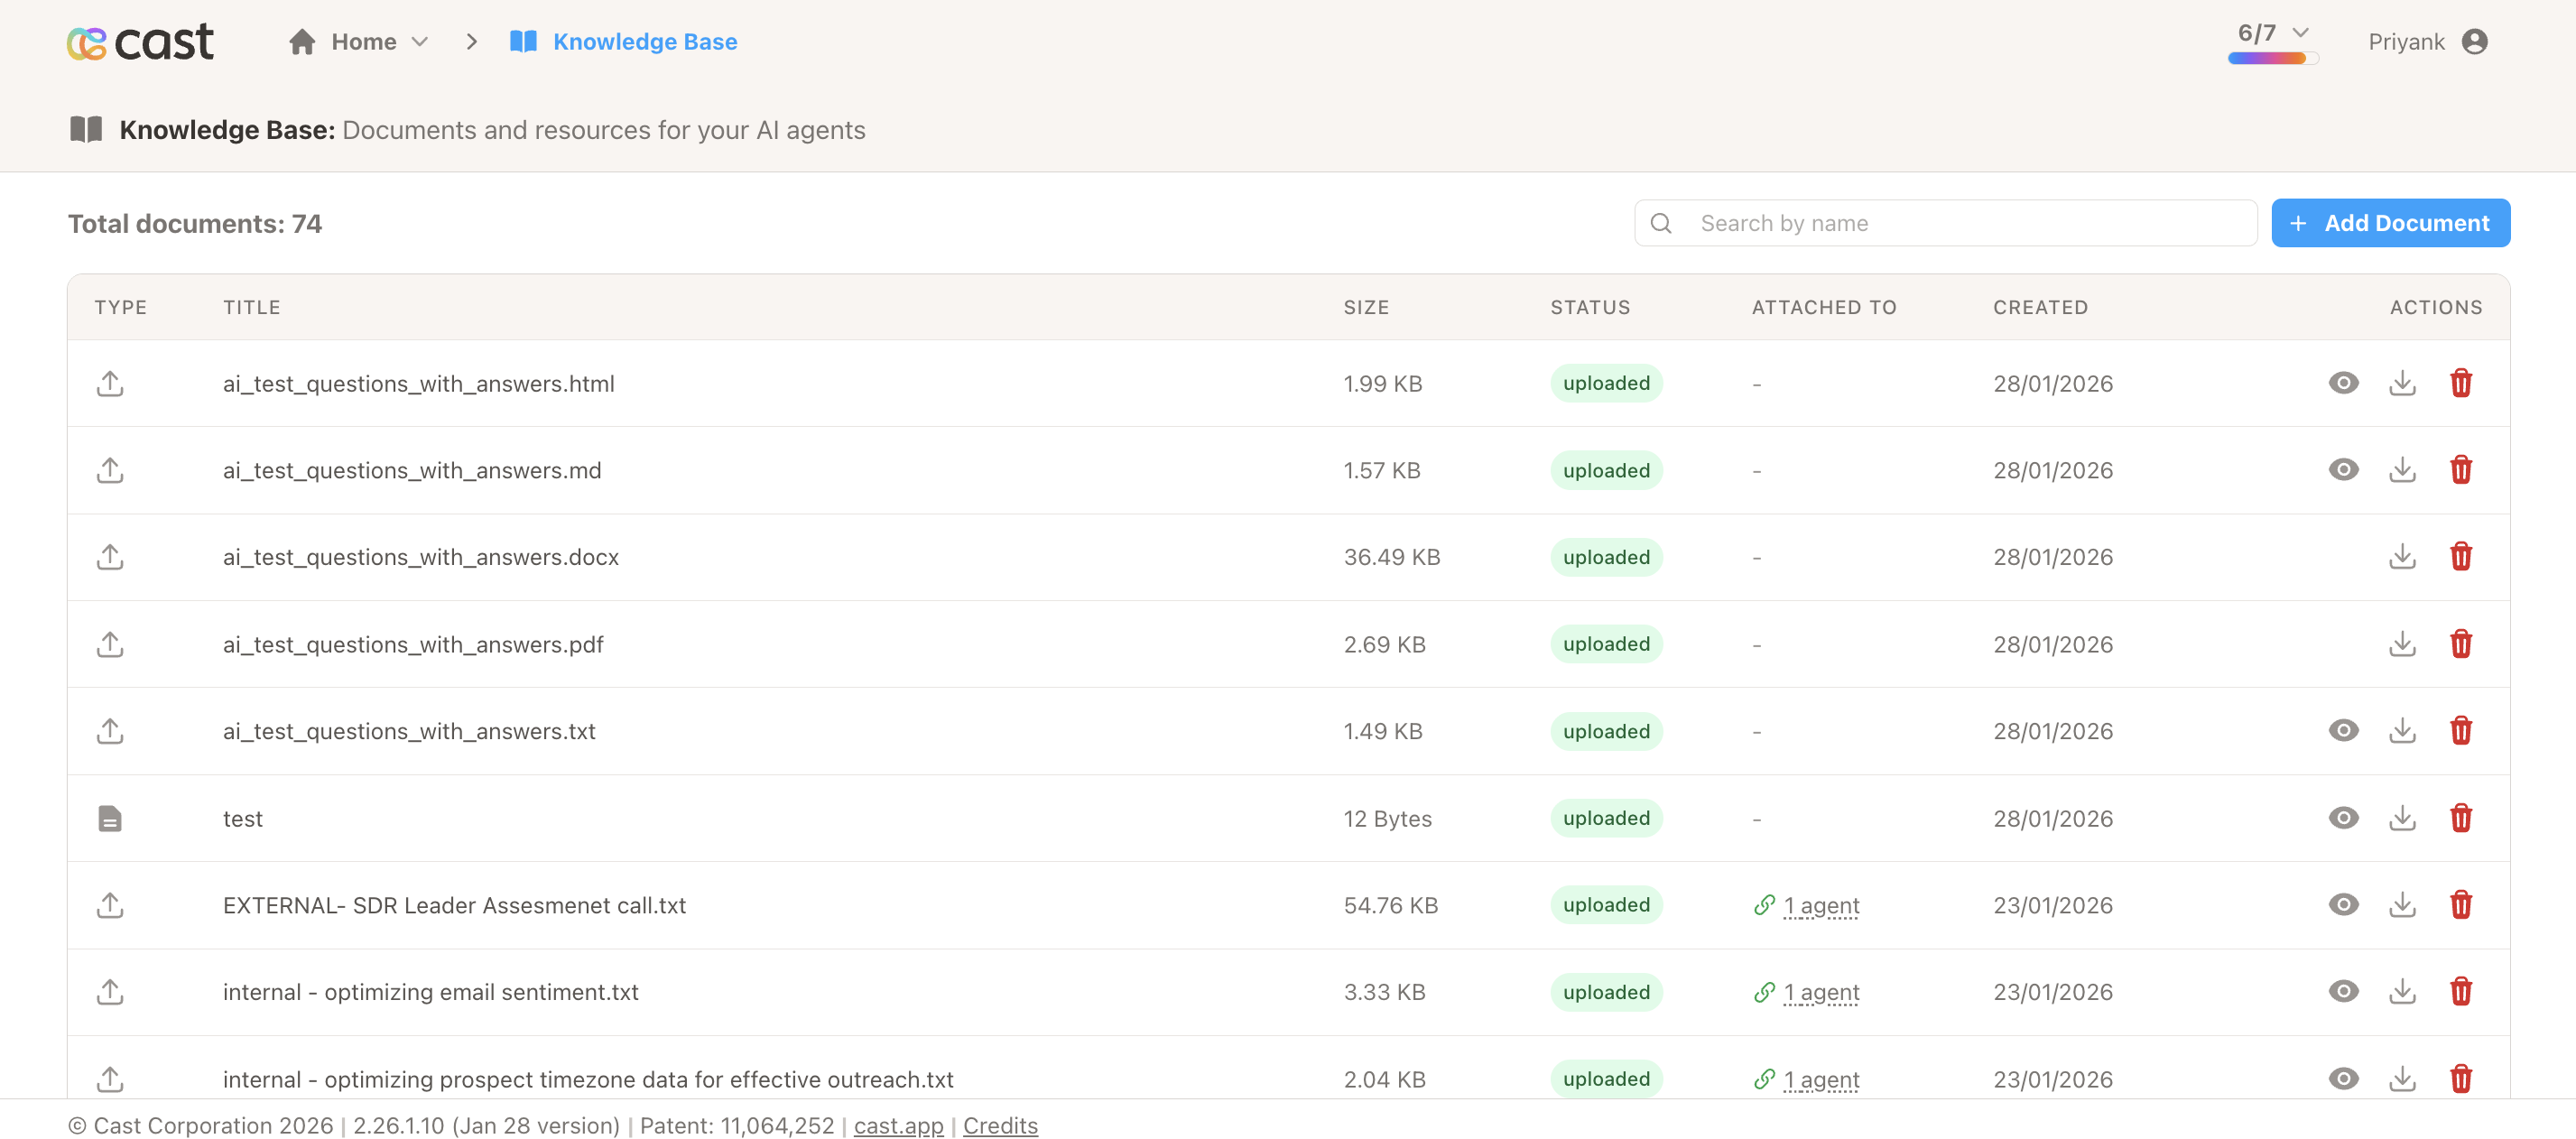
- Pending (gray) - Queued for processing
- Processing (blue) - Being scraped or uploaded
- Uploading (blue) - Sending to AI platform
- Uploaded (green) - Ready to attach to agents
- Error (red) - Something went wrong (retry available)
The page refreshes automatically every 5 seconds. You can navigate away and come back later.
Wait for the status to show “Uploaded” (green) before proceeding to the next step.
Step 4: Attach Document to Agent
Section titled “Step 4: Attach Document to Agent”Note: The Knowledge Base Documents section will appear after your agent ID is configured. If you don’t see it, contact support@cast.app to set up your agent ID.
Once your document shows “Uploaded” status:
- Navigate to Projects → Select your project → Settings
- Scroll down to the Ask Me Anything section
- Expand the Agent Personas accordion
- Scroll to the Knowledge Base Documents section (appears after agent ID is configured)
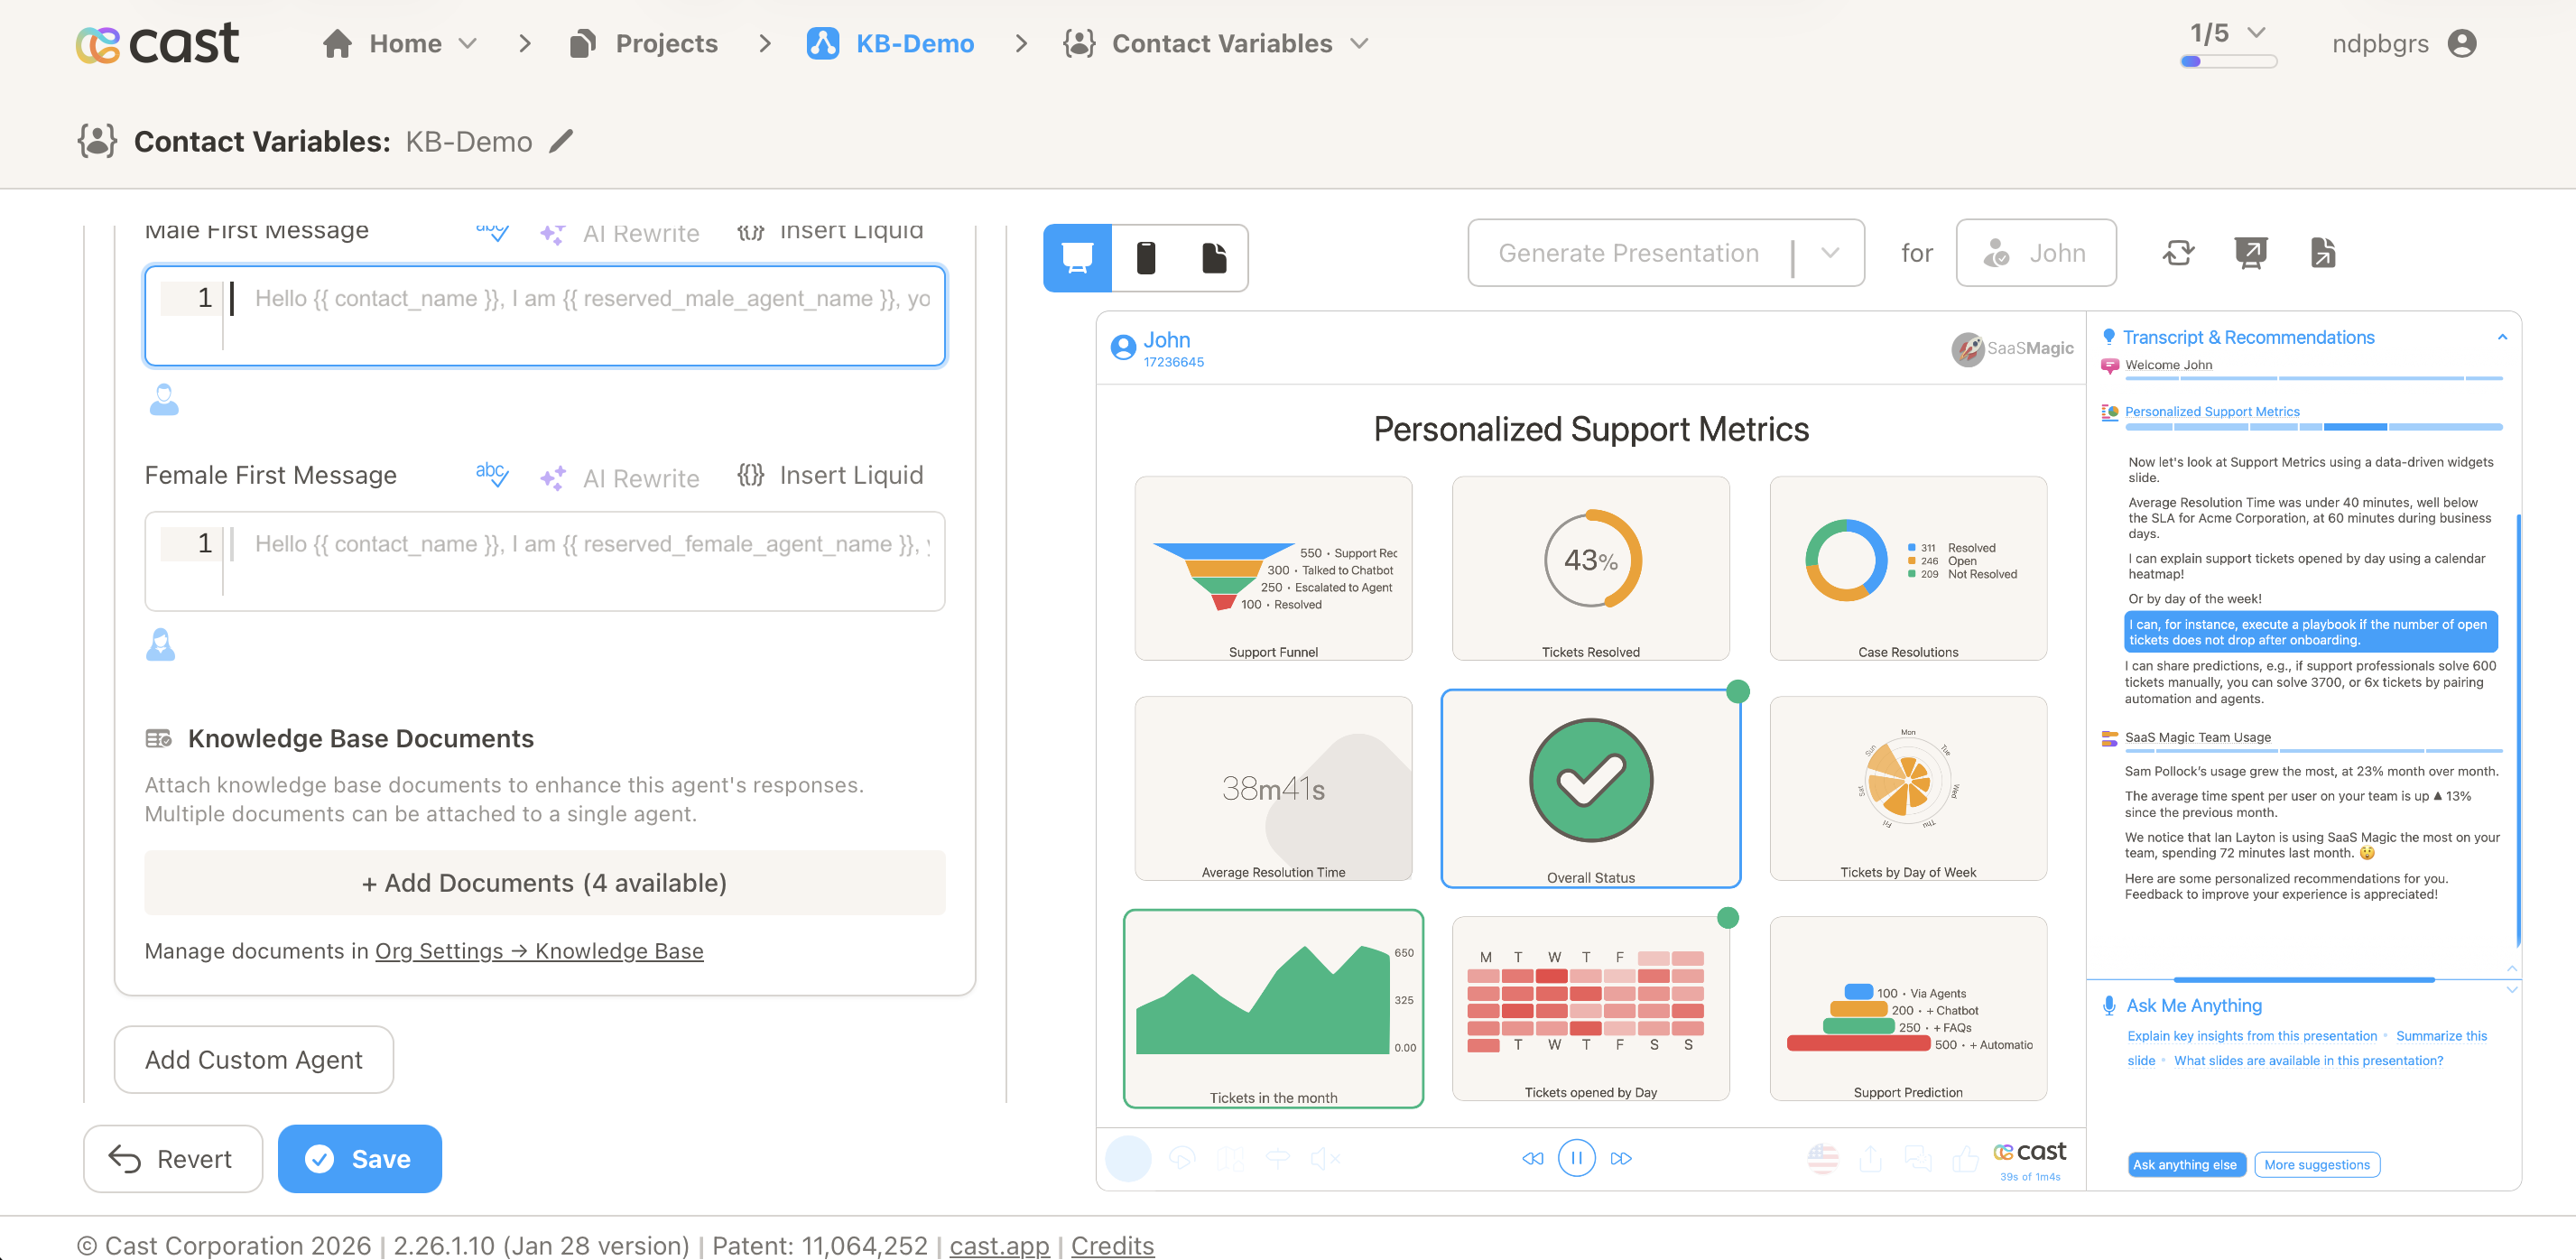
- Click Attach Documents button
- A modal will appear showing all available documents
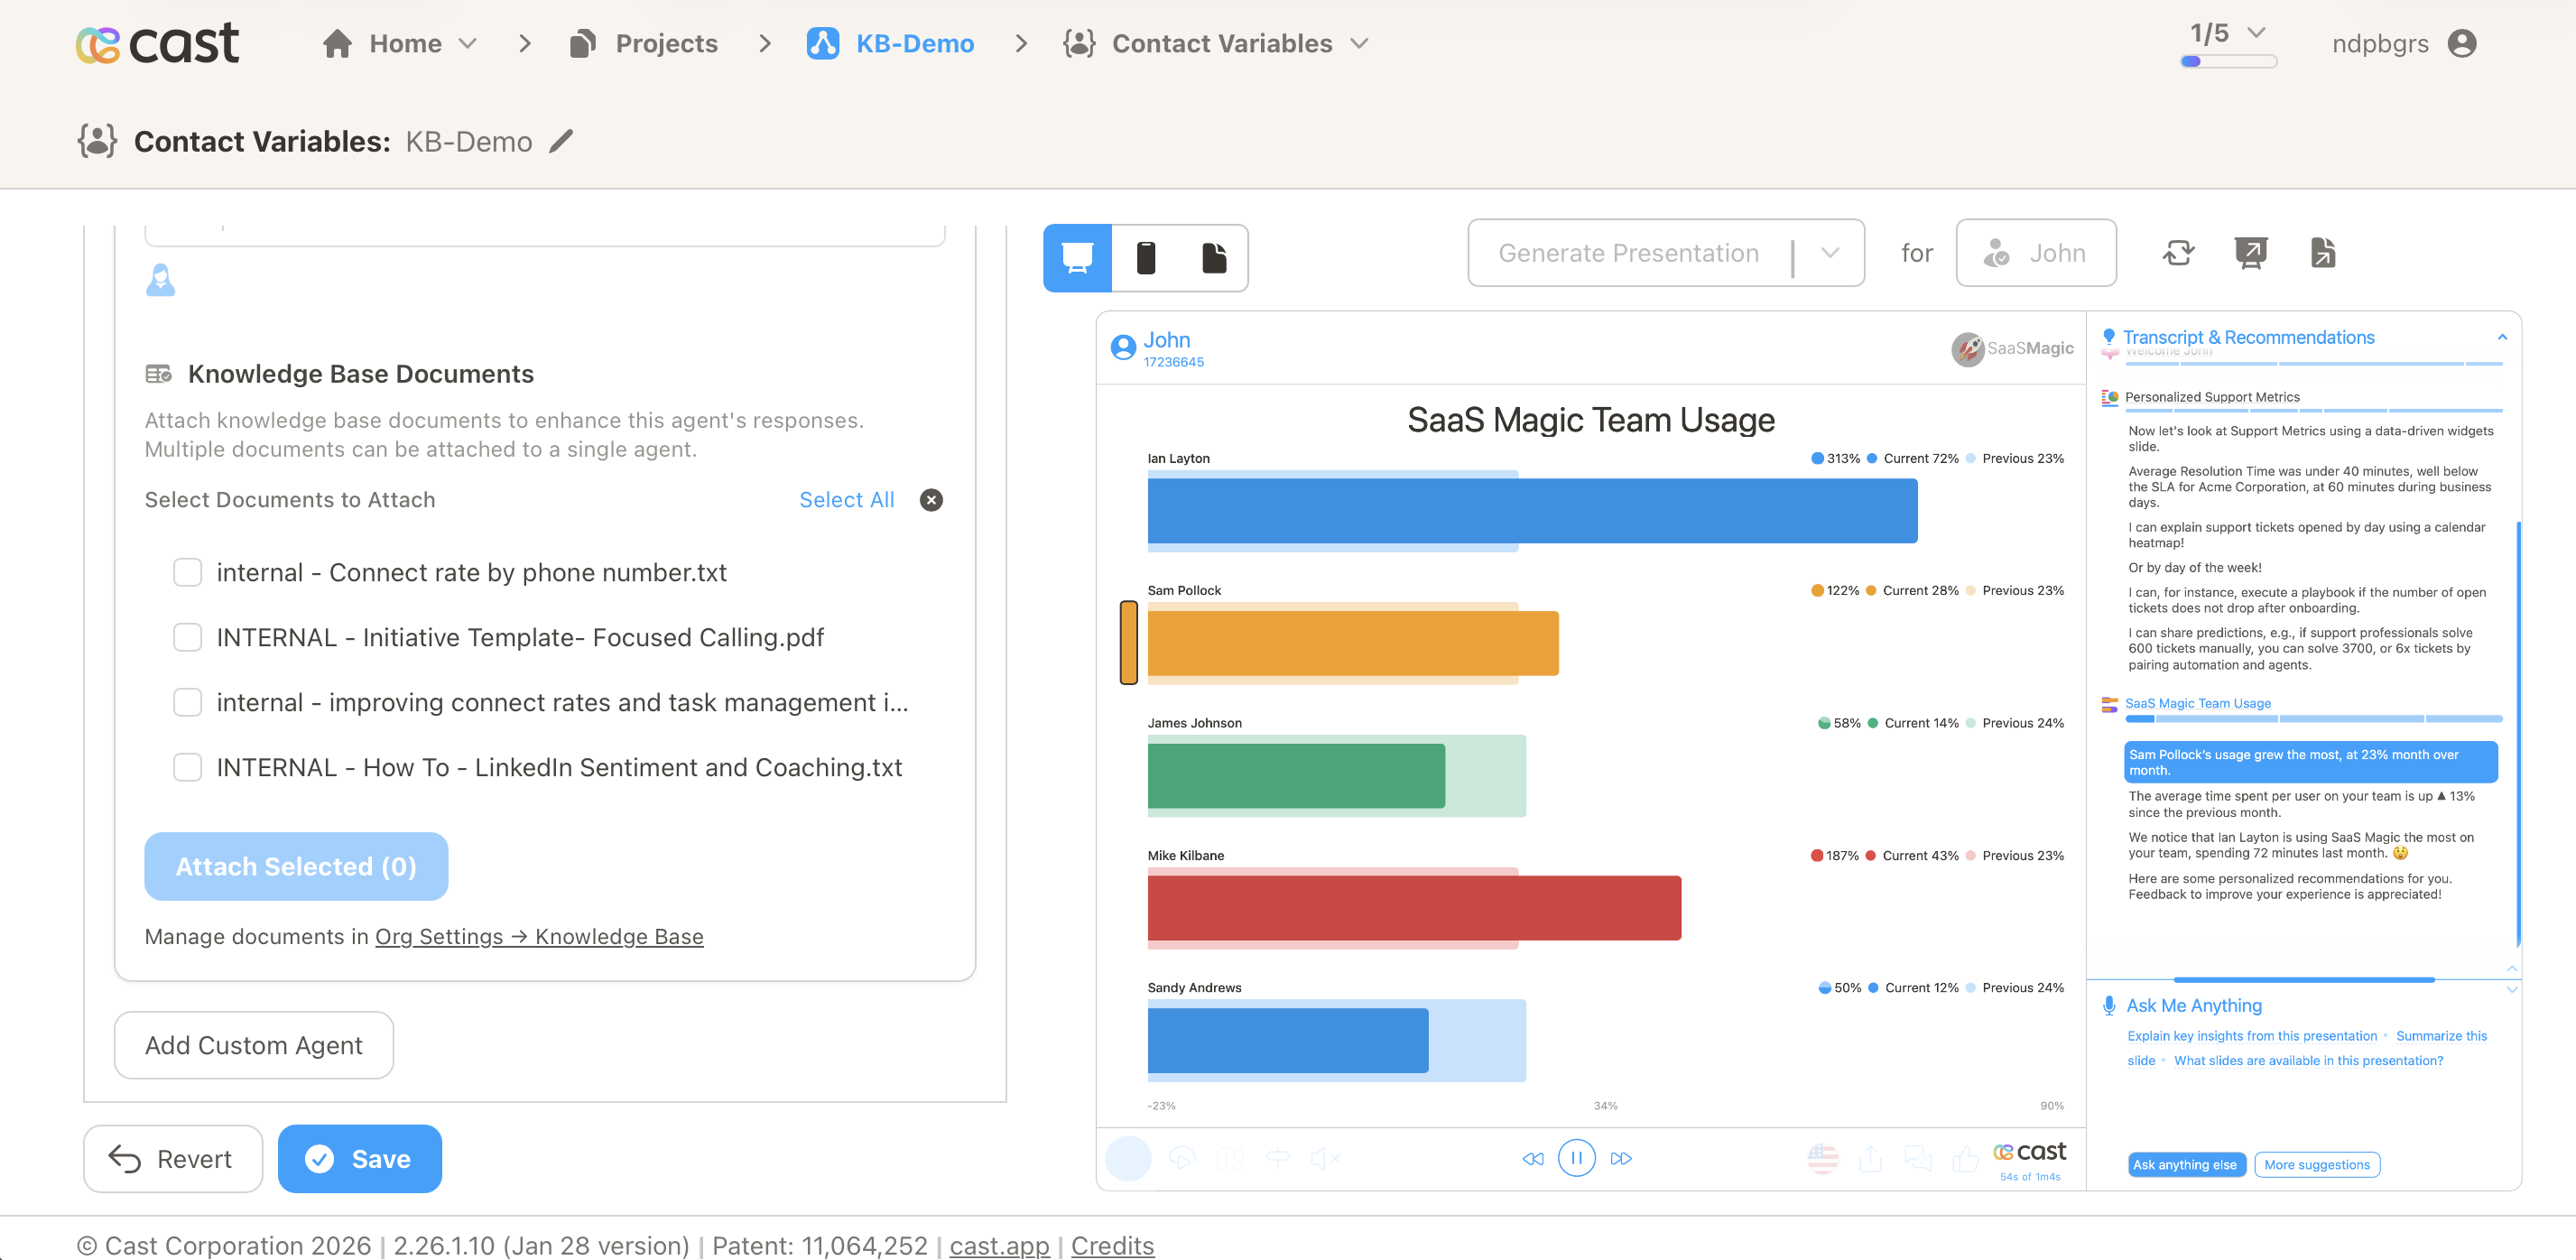
- Check the box next to your document
- Click Attach Selected
Your document is now attached to the agent and will appear in the attached documents list.
Step 5: Test Your Agent
Section titled “Step 5: Test Your Agent”Now test that your agent can use the knowledge:
- Open your Cast player or preview
- Go to the Ask Me Anything section
- Ask a question related to your document content
- The agent should provide answers using information from the document
Example: If you uploaded a product FAQ, ask “What is Cast?” or “How much does it cost?”
Congratulations!
Section titled “Congratulations!”You’ve successfully created your first knowledge document and attached it to an AI agent. Your agent now has access to this information when responding to questions.
Next Steps
Section titled “Next Steps”Now that you understand the basics:
Add More Documents
Section titled “Add More Documents”Create additional documents from different sources to expand your agent’s knowledge base.
Explore Document Types
Section titled “Explore Document Types”Learn about the different document source types and when to use each one: Document Types
Manage Your Documents
Section titled “Manage Your Documents”Learn how to search, preview, refresh, and manage your knowledge documents: Managing Documents
Attach to Multiple Agents
Section titled “Attach to Multiple Agents”Attach the same documents to multiple agents across different projects: Agent Integration
Need Help?
Section titled “Need Help?”- Support: support@cast.app
- FAQ: FAQ & Troubleshooting
- Quick Reference: Cheat Sheet