Info Graphic
A Info Graphic slide lets you personalize the background with user or account specific data. The slide is compatible with both static SVGs and animated SVGs with embedded CSS.
To use this slide, you must create an SVG background image with certain variables.
SVG Backgrounds
You can use static or animated SVGs with embedded CSS as background.
For desktop SVGs, we have standardized on 1080 x 810, but the aspect ratio of 4:3 is what matters most.
For mobile, we chose 440 x 836; again, the aspect ratio (1: 1.9) matters for vector graphics.
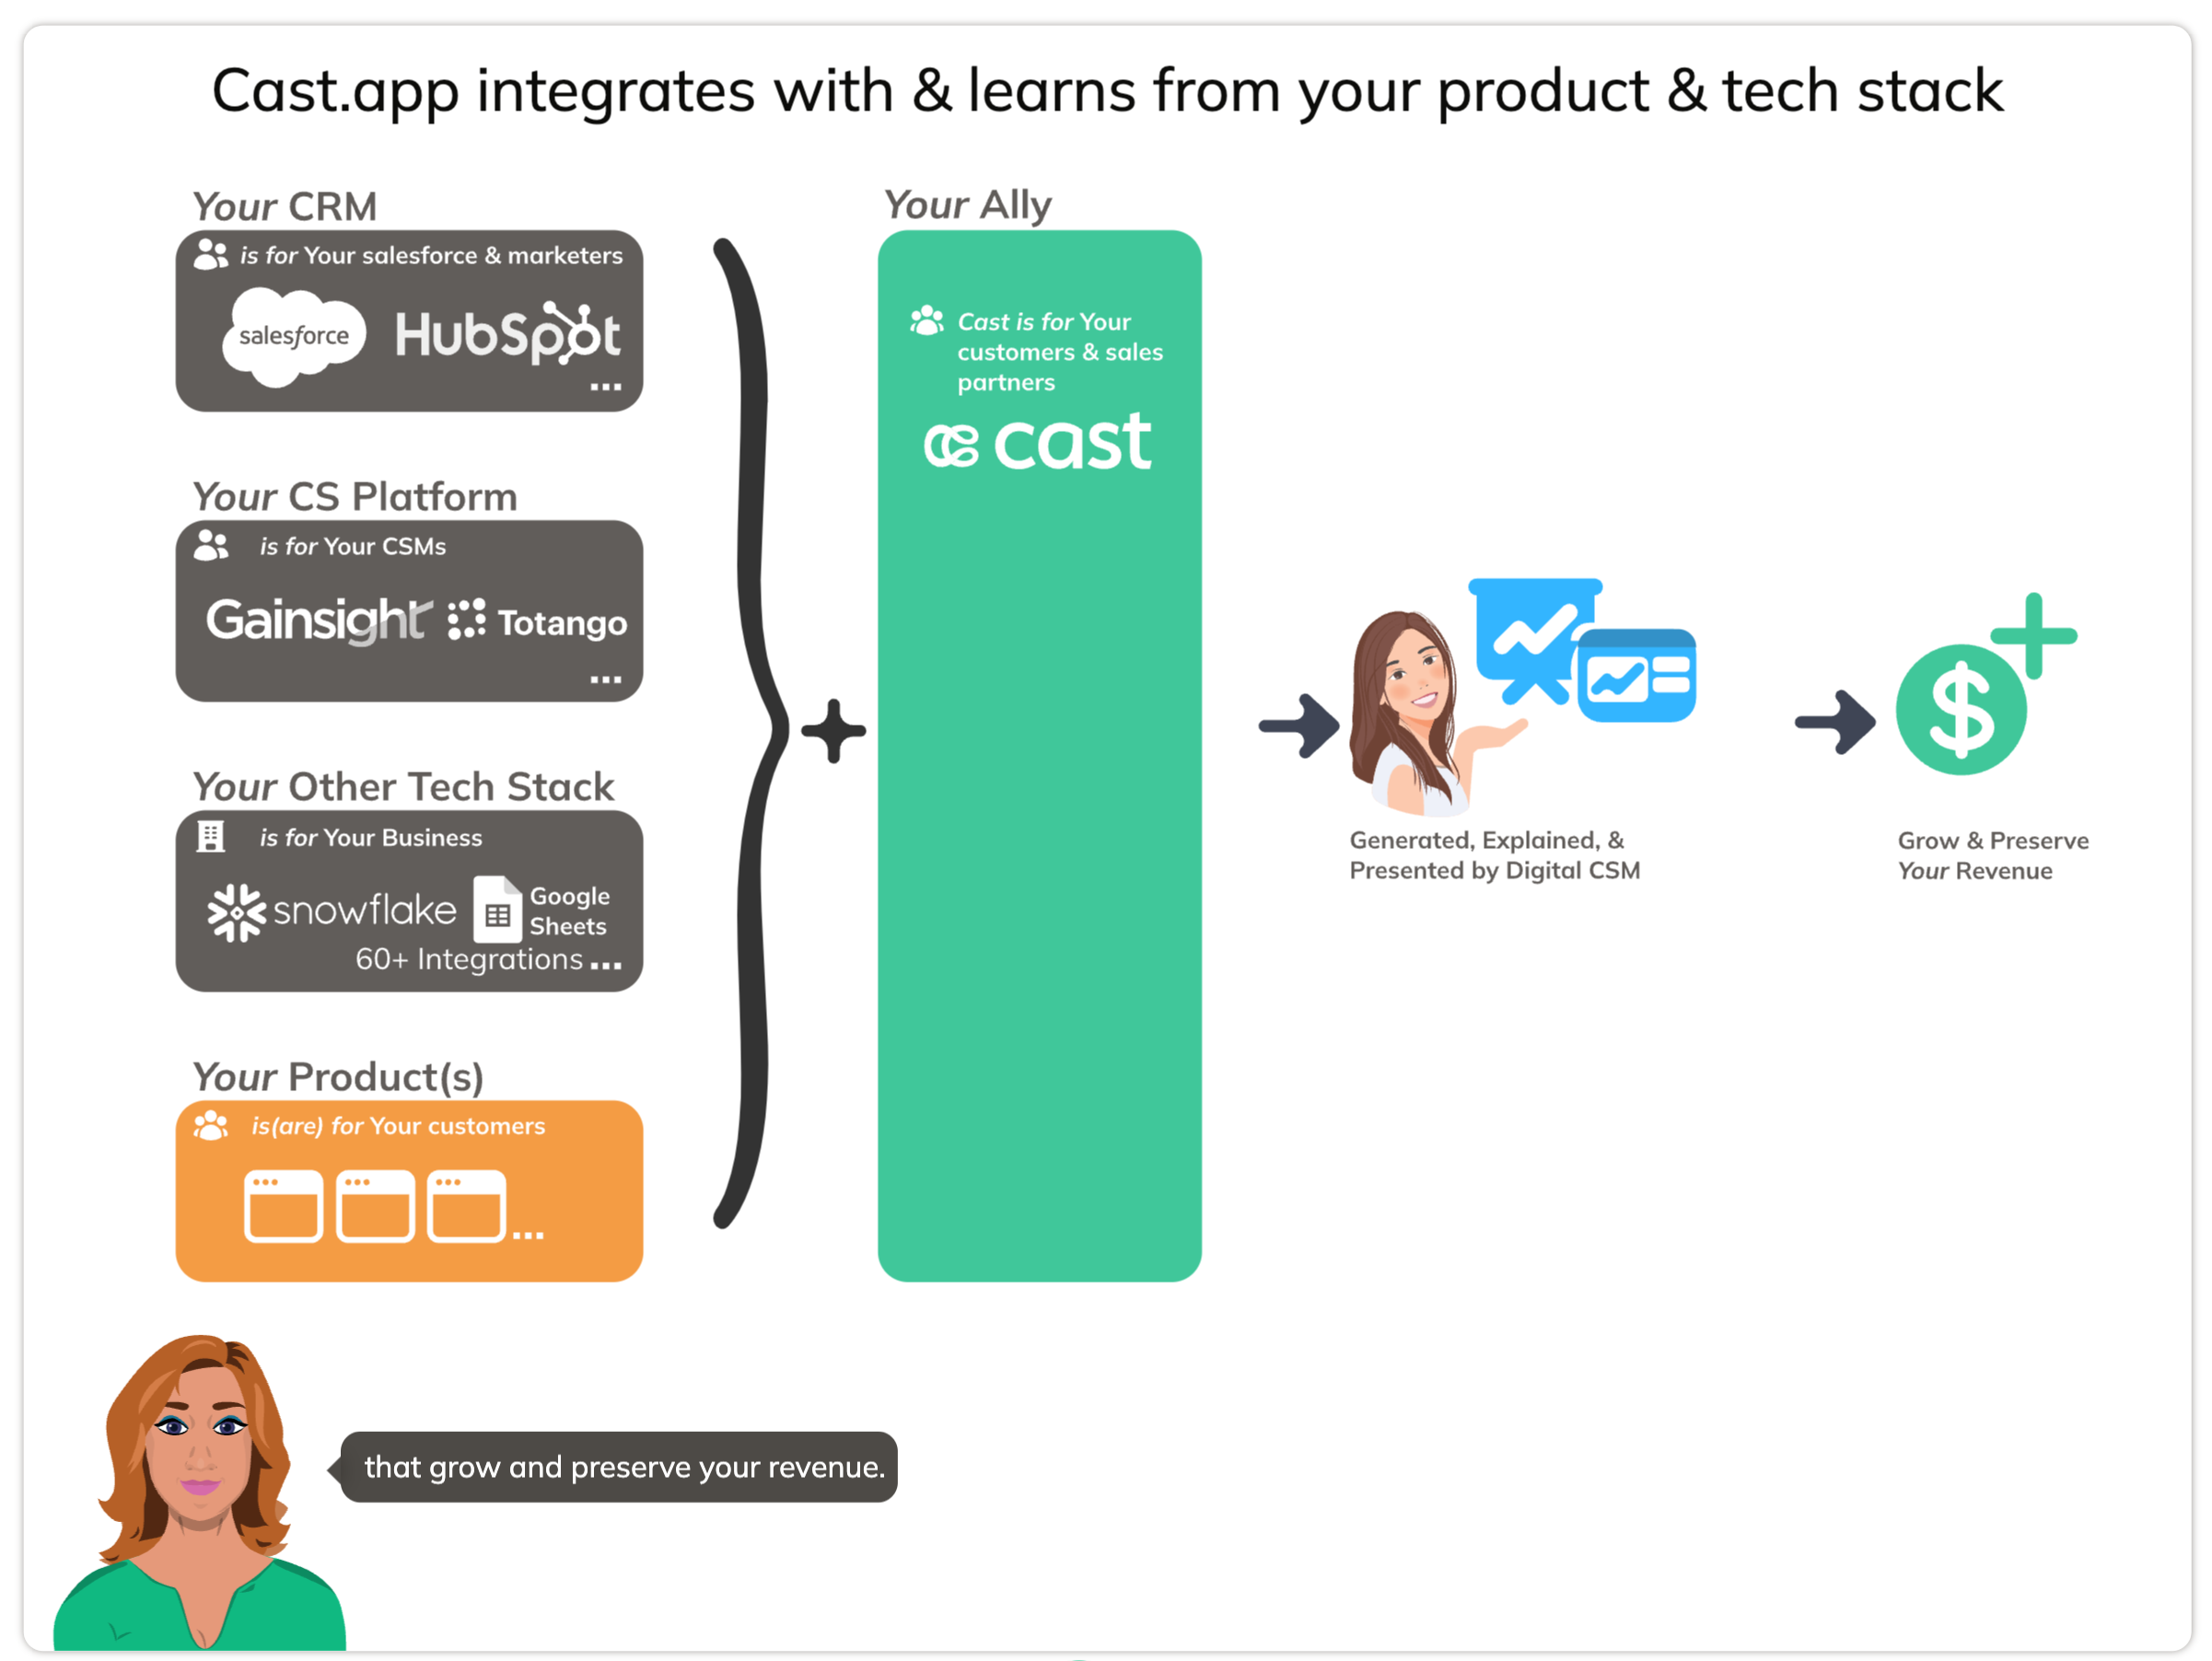
Cast.app also supports Personalized SVGs. Personalized SVGs allow you to:
-
Personalize the contents of a variable in the SVG with svg element identifiers containing “lc_“.
E.g., abc-lc_csm-name and lc_csm-email would be replaced by contents of liquid variables named:
{{ csm-name }} and {{ csm-email }} <text id="abc-lc_csm-name">csmFirst csmLast</text> <text id="lc_csm-email">csm@email.com</text> -
Show, hide, or dim elements in the SVG with identifiers containing “lc_“ or “hid_“.
E.g., something-hid_nrr and abc-lc_csm-name could be displayed, hidden, or dimmed per narration.
<text id="abc-lc_csm-name">csmFirst csmLast</text>
<g id="something-hid_nrr"><path></path></g>
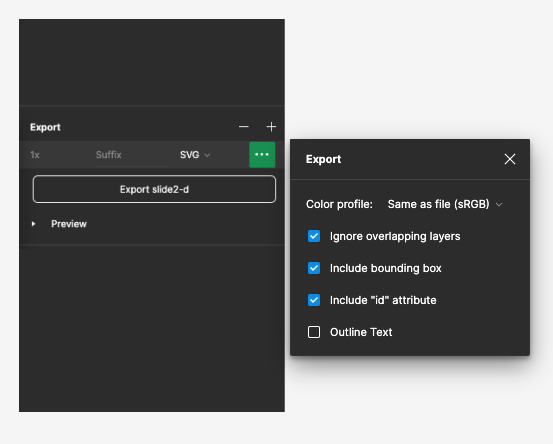
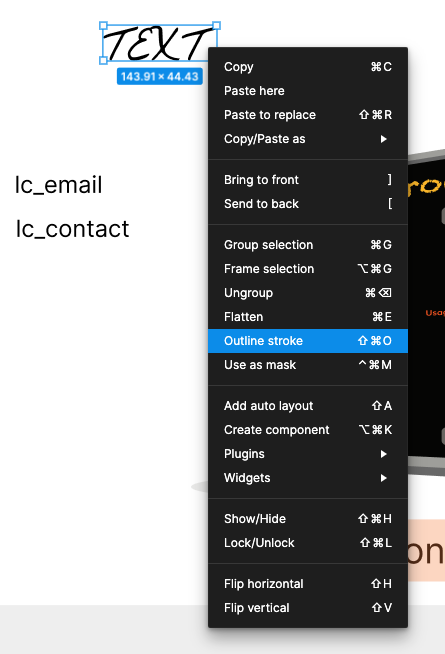
Vector Graphics - Exporting Personalized SVGs from Figma
To preserve SVG identifiers and text elements when exporting an SVG,
- Include bounding box should always be checked.
- Include “id” attribute must always be checked.
- Outline Text must be unchecked, especially if there are “lc_“ variables in your svg. However, if you have text elements with unique fonts you do not want to personalize, you can always right-click and select “Outline stroke” on the the variable and check Outline Text.
Vector Motion Graphics - Exporting Personalized SVGs from Figma, and animating them in SVGator
Create your base svg in Figma, then upload to Svgator and apply desired animations. When Exporting an animated SVG, make the following changes to preserve identifiers and text.
- Exported IDs: change to “Element’s name”
- Animation type: change to “CSS only”. We do not support javascript embedded animations because of security concerns.
- Set Direction to “Normal”, “Reverse”, or “Alternate”, etc.
- Set Iterations to “Infinite” or set a desired count
- Click on “Refresh preview” to view the configured animation
- Click “Save” after making changes to ensure your settings are preserved.
- Click “Export”
- Note: Svgator usually appends the file name to the id’s, before “hid_“ and “lc_“, so “lc_csm-name” will become “abc-lc_csm-name”. Cast will automatically detect ids with and without the prepended file name.
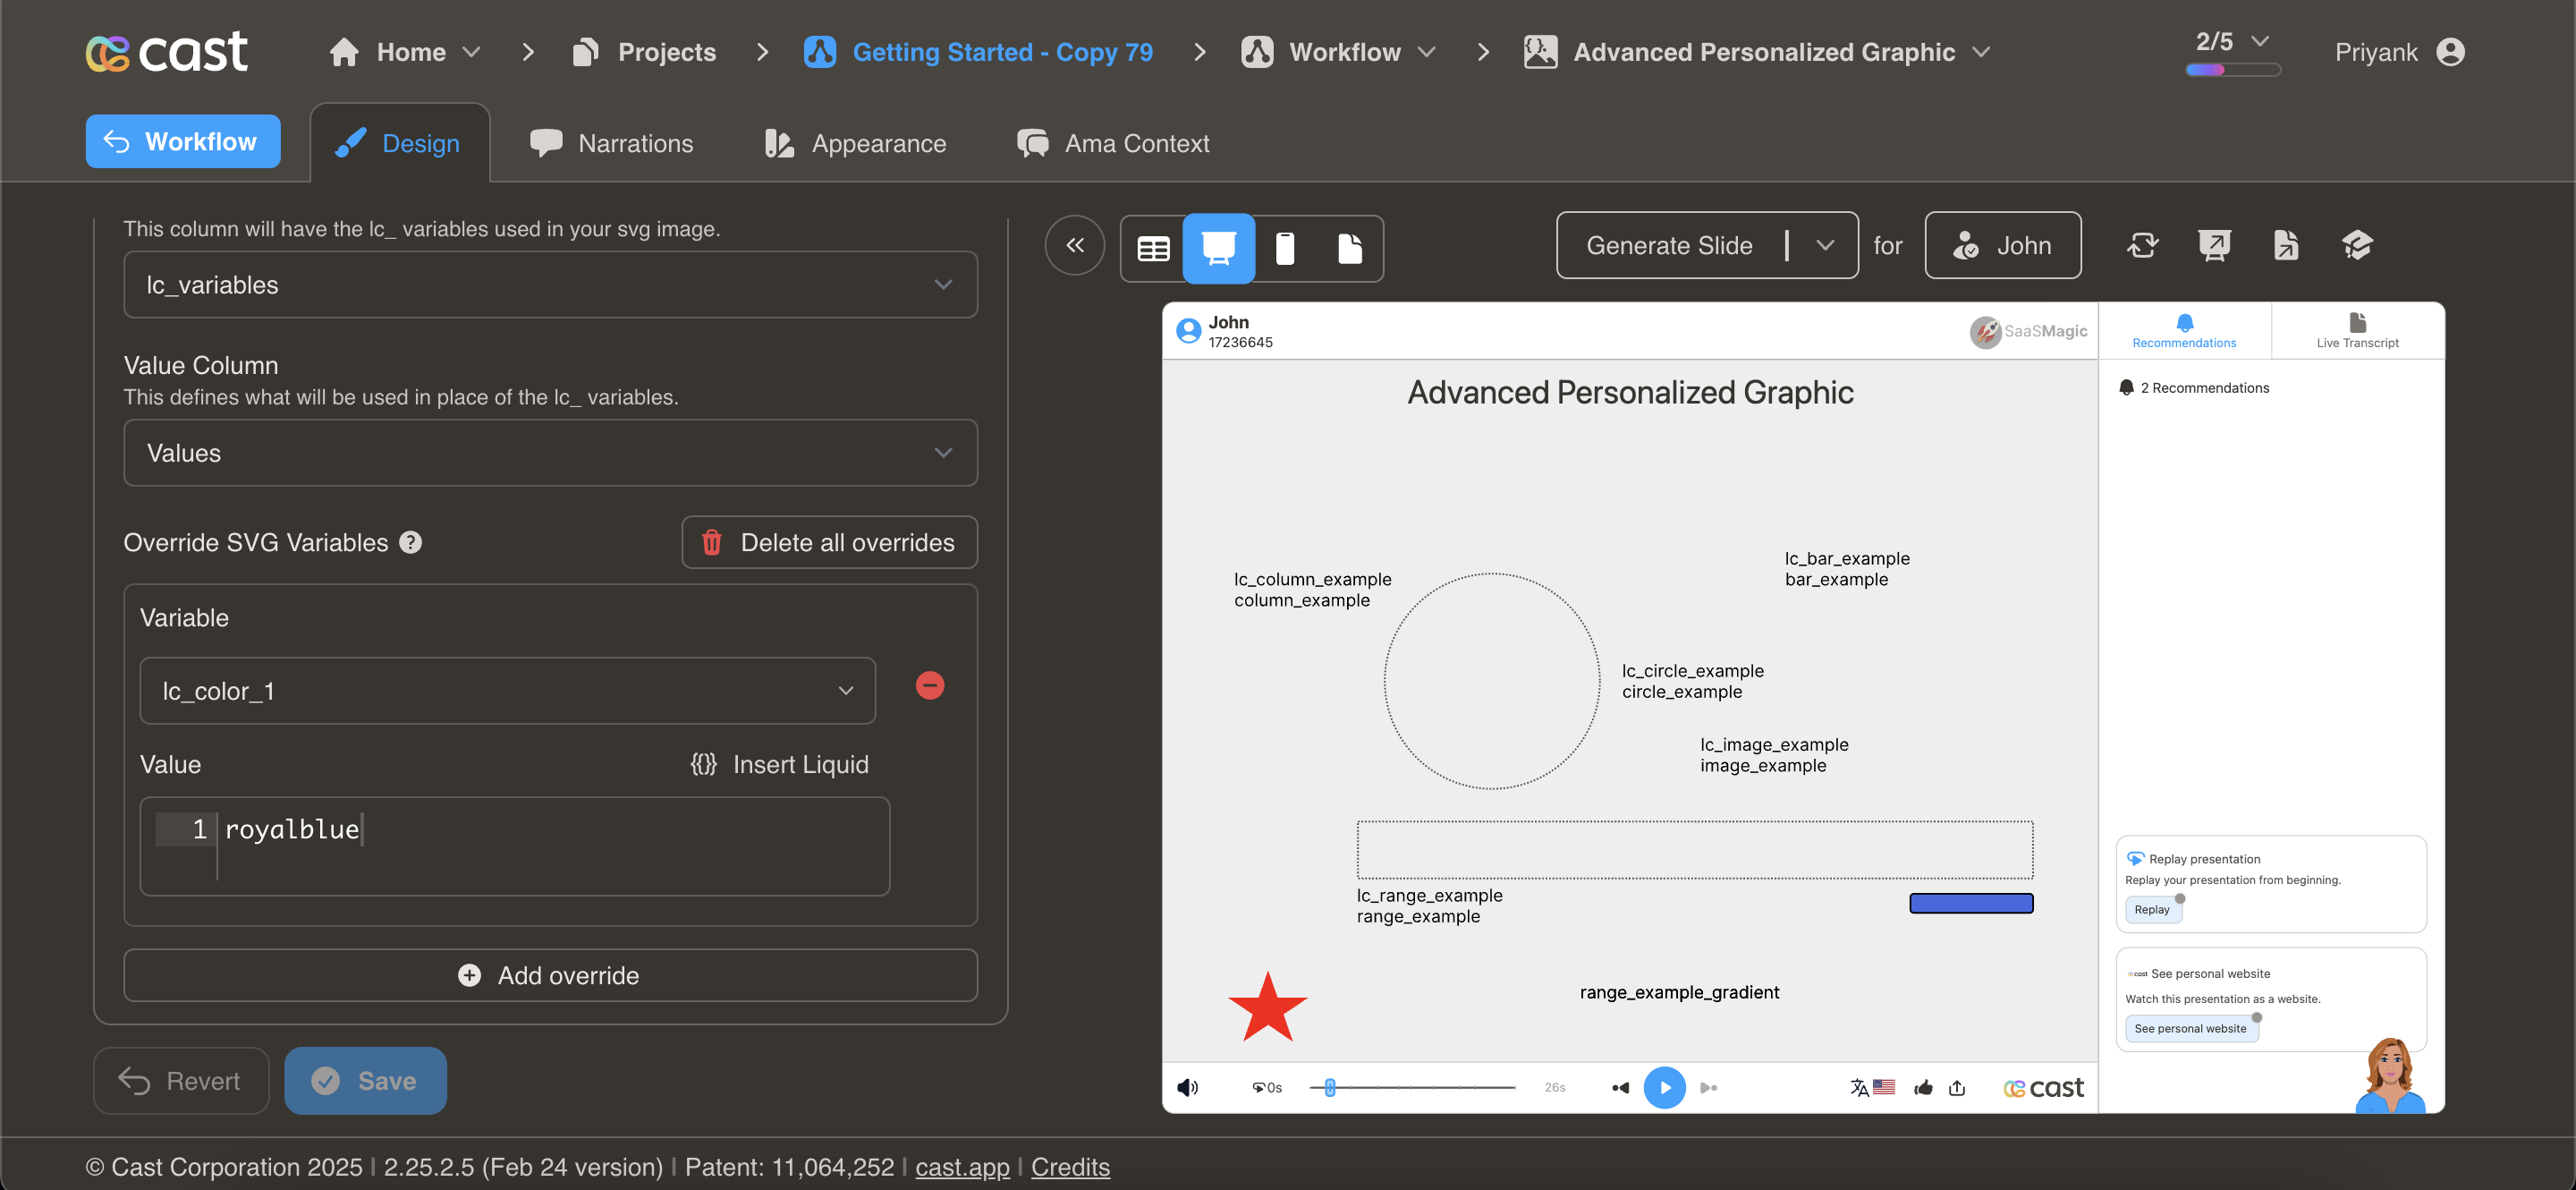
Dynamically Setting SVG Attributes with lc_xxx*
This documentation describes how to dynamically adjust the width/height of
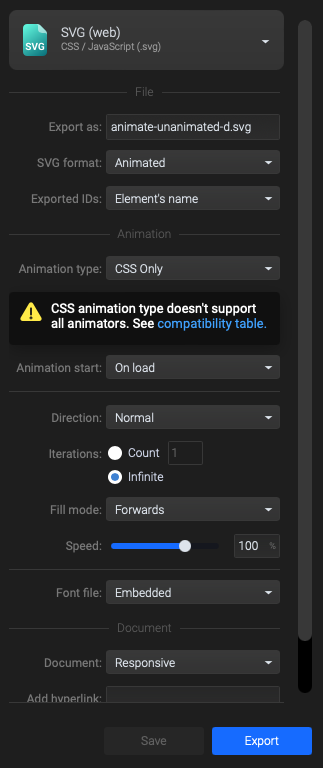
Dynamic Width and Position Adjustments with lc_range* and lc_range_bg
lc_range Prefix used for the IDs of
lc_range_bg Creates a background track for range sliders with 30% opacity and Matches the color of the active range element
Identify the Element:
The target element must be a
Identify the target element as an <img> tag with an ID starting with lc_range_bg.
Input Format:
The input value should be a string in the format xPercentage,widthPercentage. Example: “10,40” xPercentage is 10% widthPercentage is 40%
Clamping Values:
- xPercentage will be clamped between 1% and 100%.
- widthPercentage will be clamped between 0% and (100% - xPercentage).
- Values above 100% will be reduced to 100%.
- Negative values will not be processed and will result in no changes.
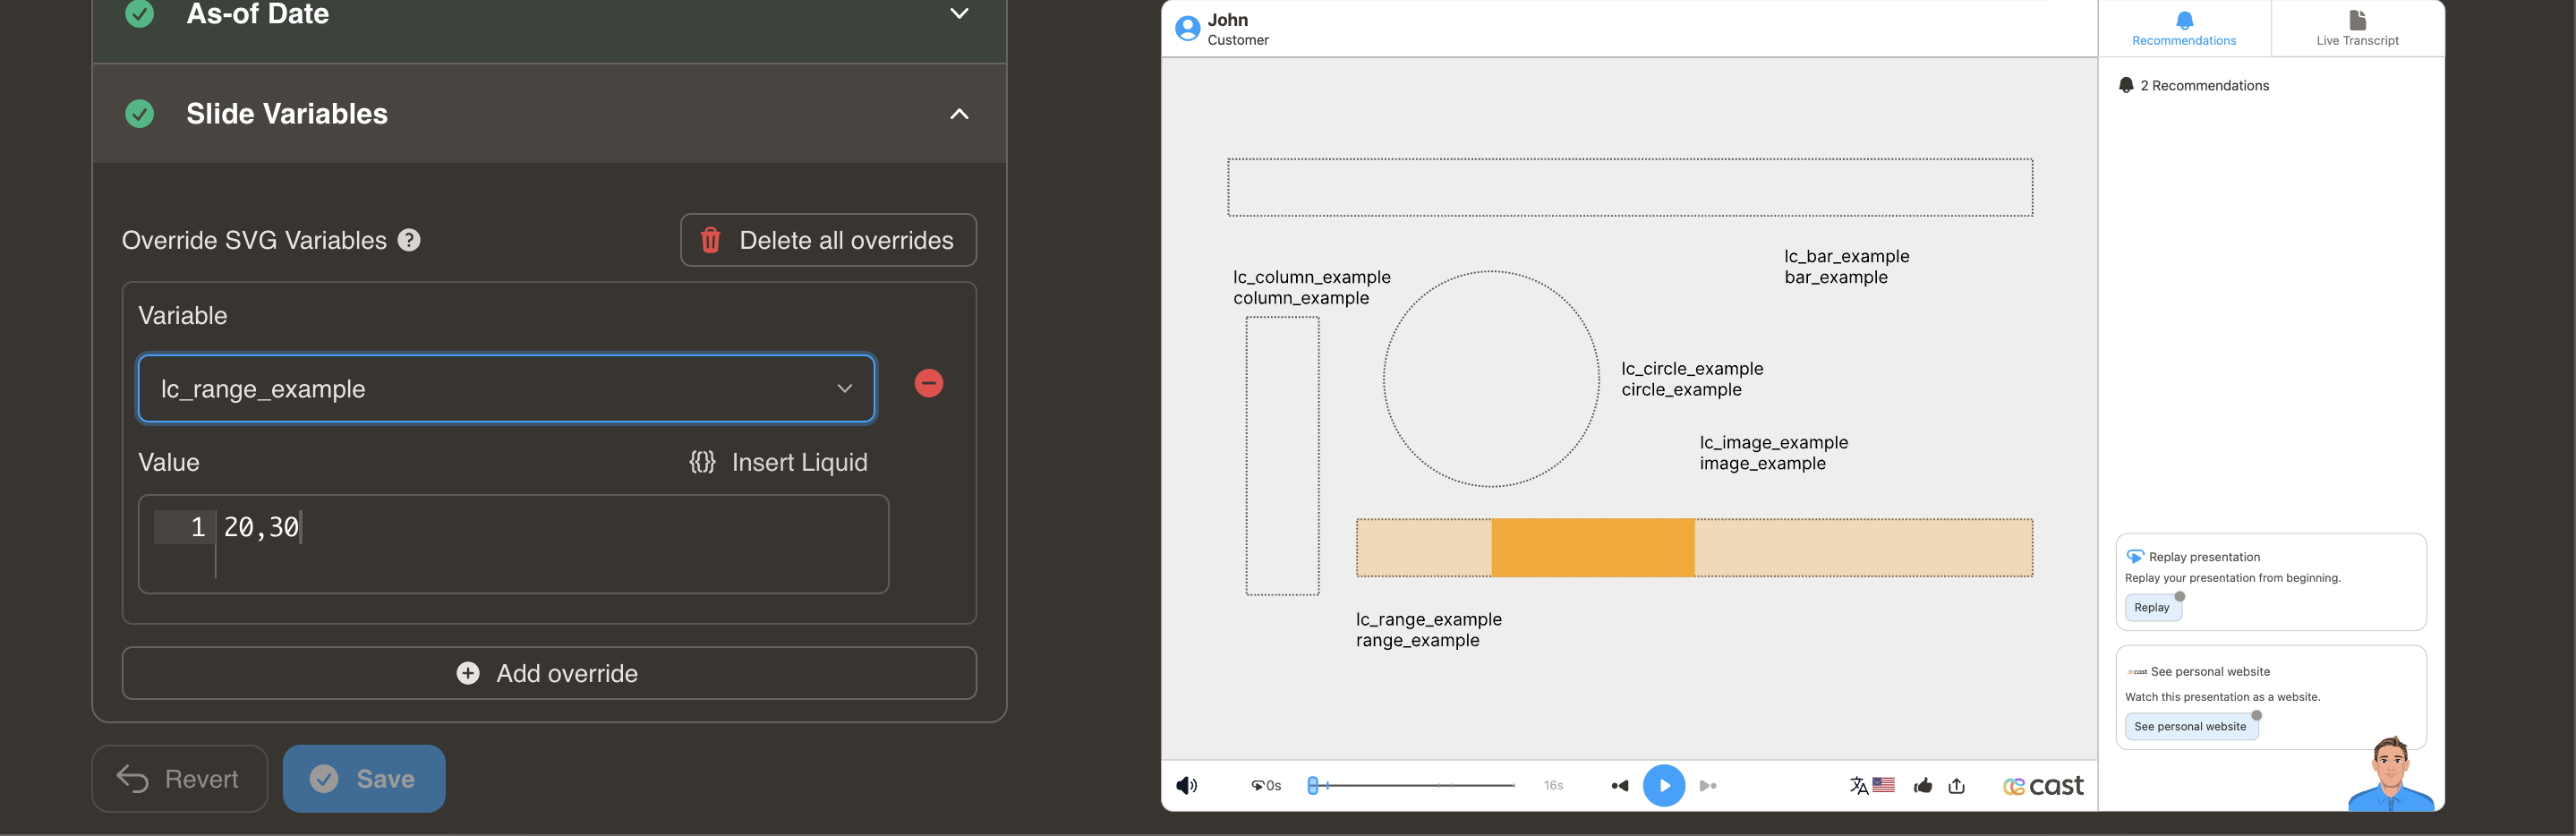
Dynamic Percentage Adjustments with lc_circle* and lc_circle_bg*
lc_circle Prefix used for the IDs of
lc_circle_bg Provides a semi-transparent circular background at 30% opacity and Uses the same color as the main circle segment
Identify the Element:
The target element must be a
Identify the target element as an <img> tag with an ID starting with lc_circle_bg.
Input Format:
The input value should specify the radius percentage. Example: “50” means the radius will be set to 50% of its original size.
Clamping Values:
- The radius percentage will be clamped between 1% and 100%.
- Values above 100% will be reduced to 100%.
- Negative values will not be processed and will result in no changes.
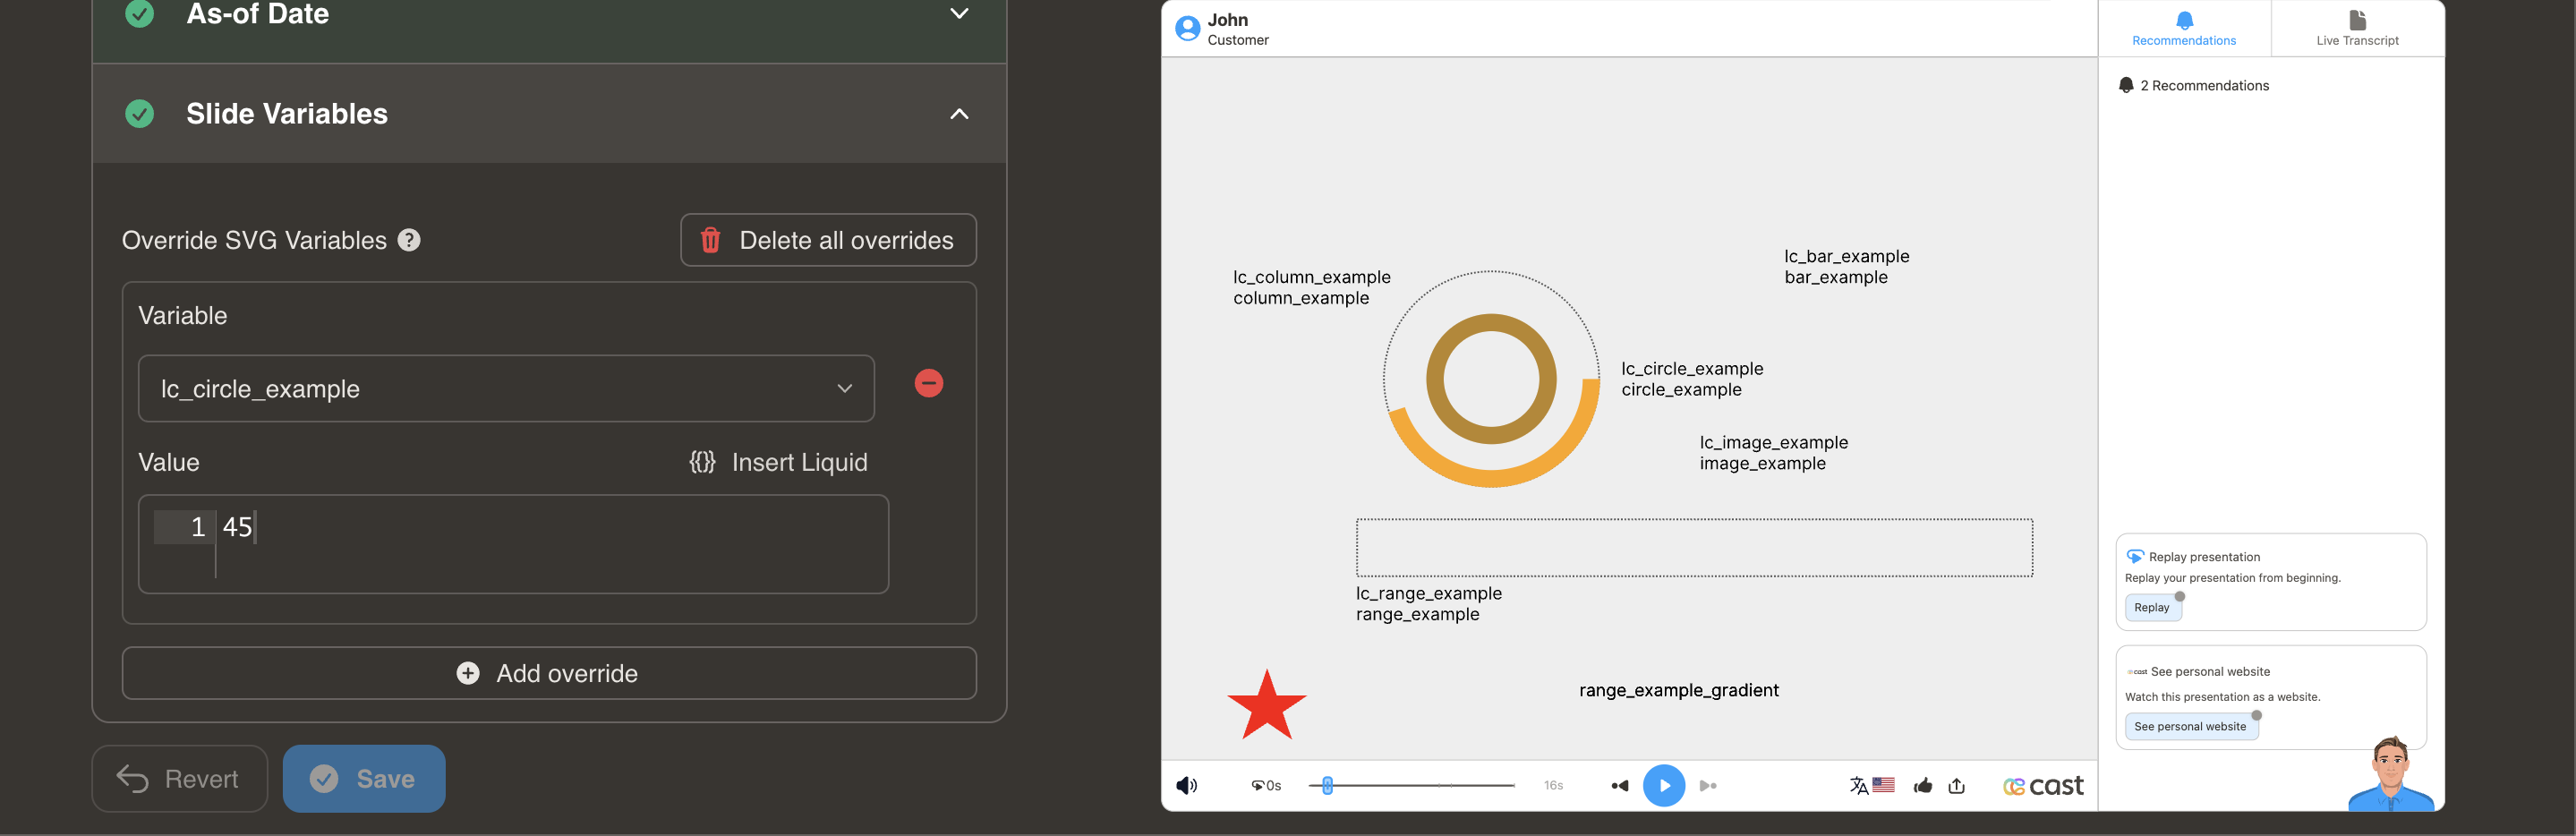
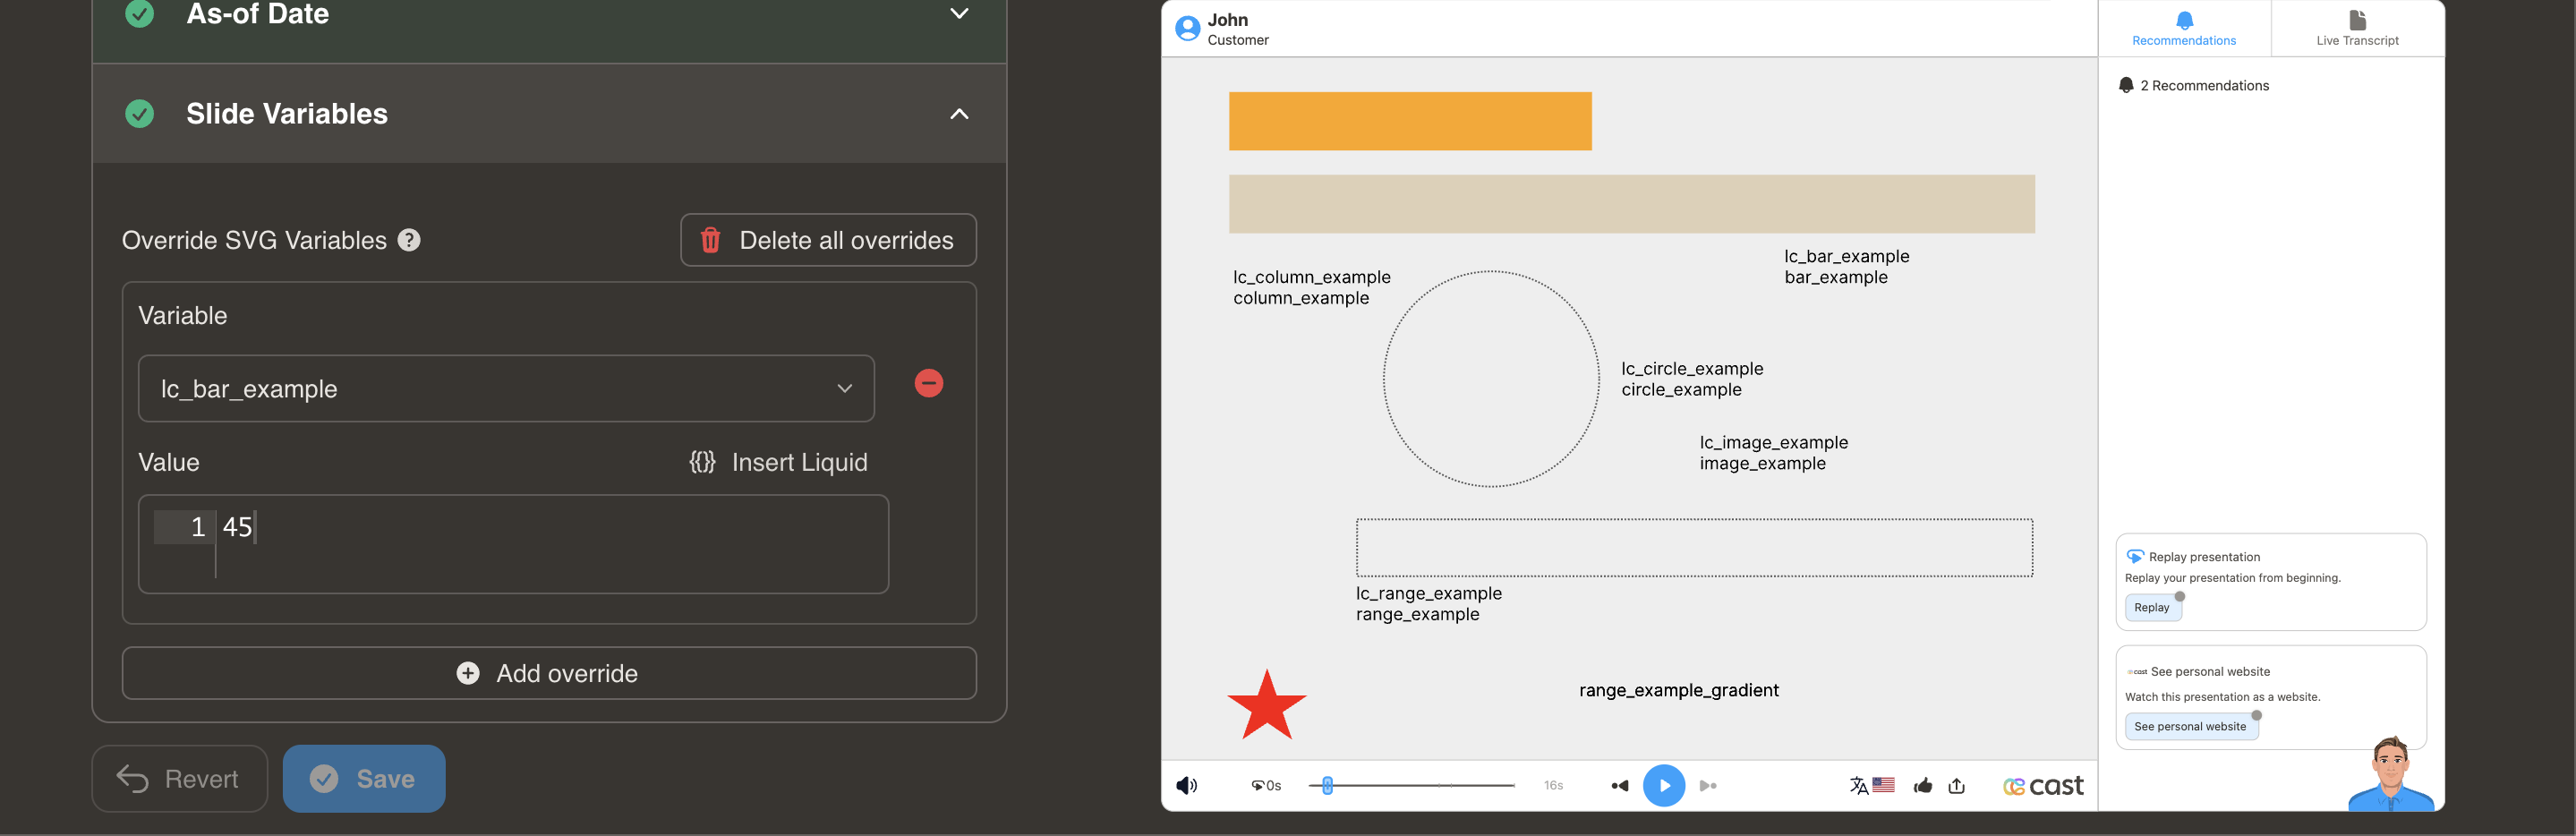
Dynamic Width Adjustments with lc_bar* and lc_bar_bg
lc_bar is a prefix used for the IDs of
lc_bar_bg For Bar Chart Backgrounds Creates a semi-transparent background layer for bar charts with 30% opacity and Maintains the same color as the primary bar element
Identify the Element
The target element must be a
Identify the target element as an <img> tag with an ID starting with lc_bar_bg*
Input Format
The input value should be a single percentage value representing the width of the bar. Example: “40” widthPercentage is 40%
Clamping Values
- widthPercentage will be clamped between 0% and 100%.
- Values above 100% will be reduced to 100%.
- Negative values will not be processed and will result in no changes.
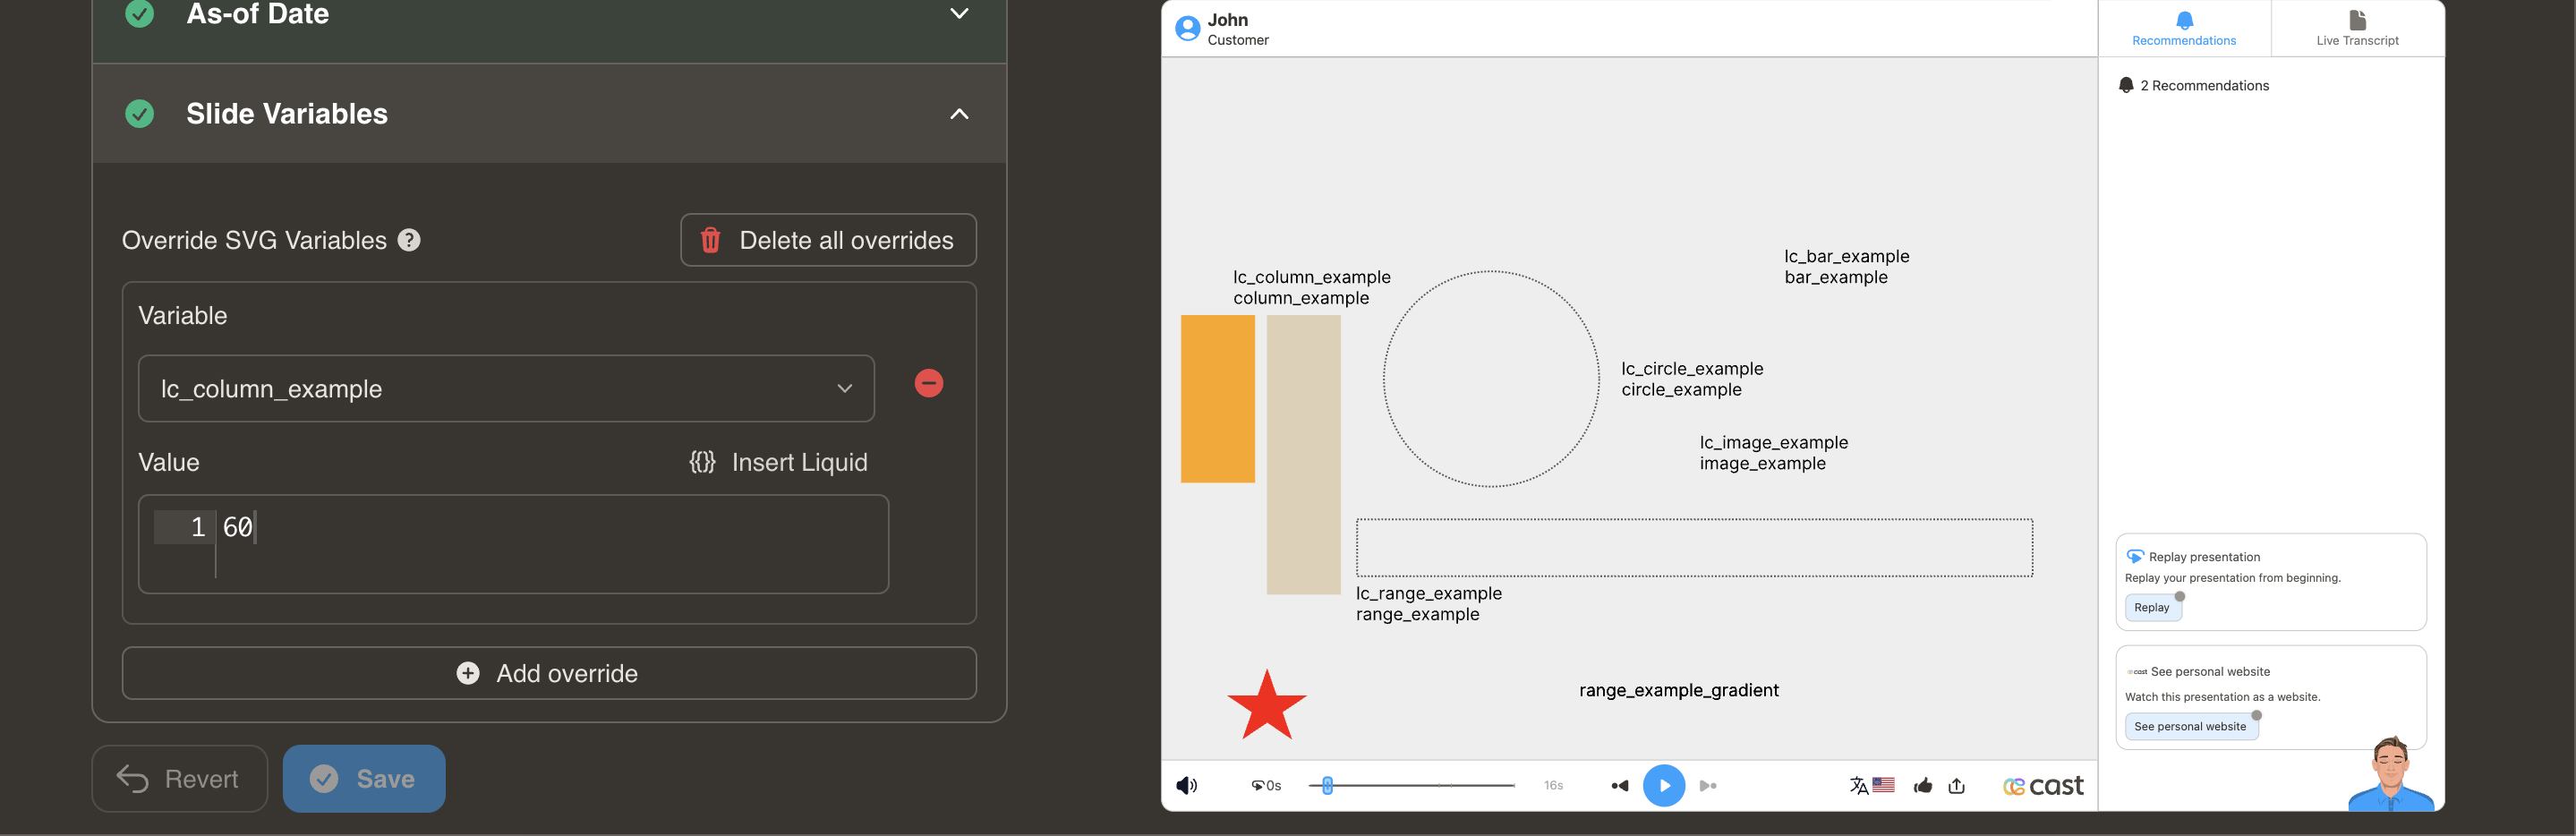
Dynamic Height Adjustments with lc_column* and lc_column_bg*
lc_column is a prefix used for the IDs of elements that need dynamic height adjustments.
lc_column_bg Provides a semi-transparent background for vertical column charts at 30% opacity and Uses the same color as the main column element
Identify the Element
The target element must be a <div> with an ID that starts with lc_column. Identify the target element as an <img> tag with an ID starting with lc_column_bg*
Input Format
The input value should be a single percentage value representing the height of the column. Example: “60” heightPercentage is 60%
Clamping Values
heightPercentage will be clamped between 0% and 100%:
- Values above 100% will be reduced to 100%.
-
Negative values will not be processed and will result in no changes.
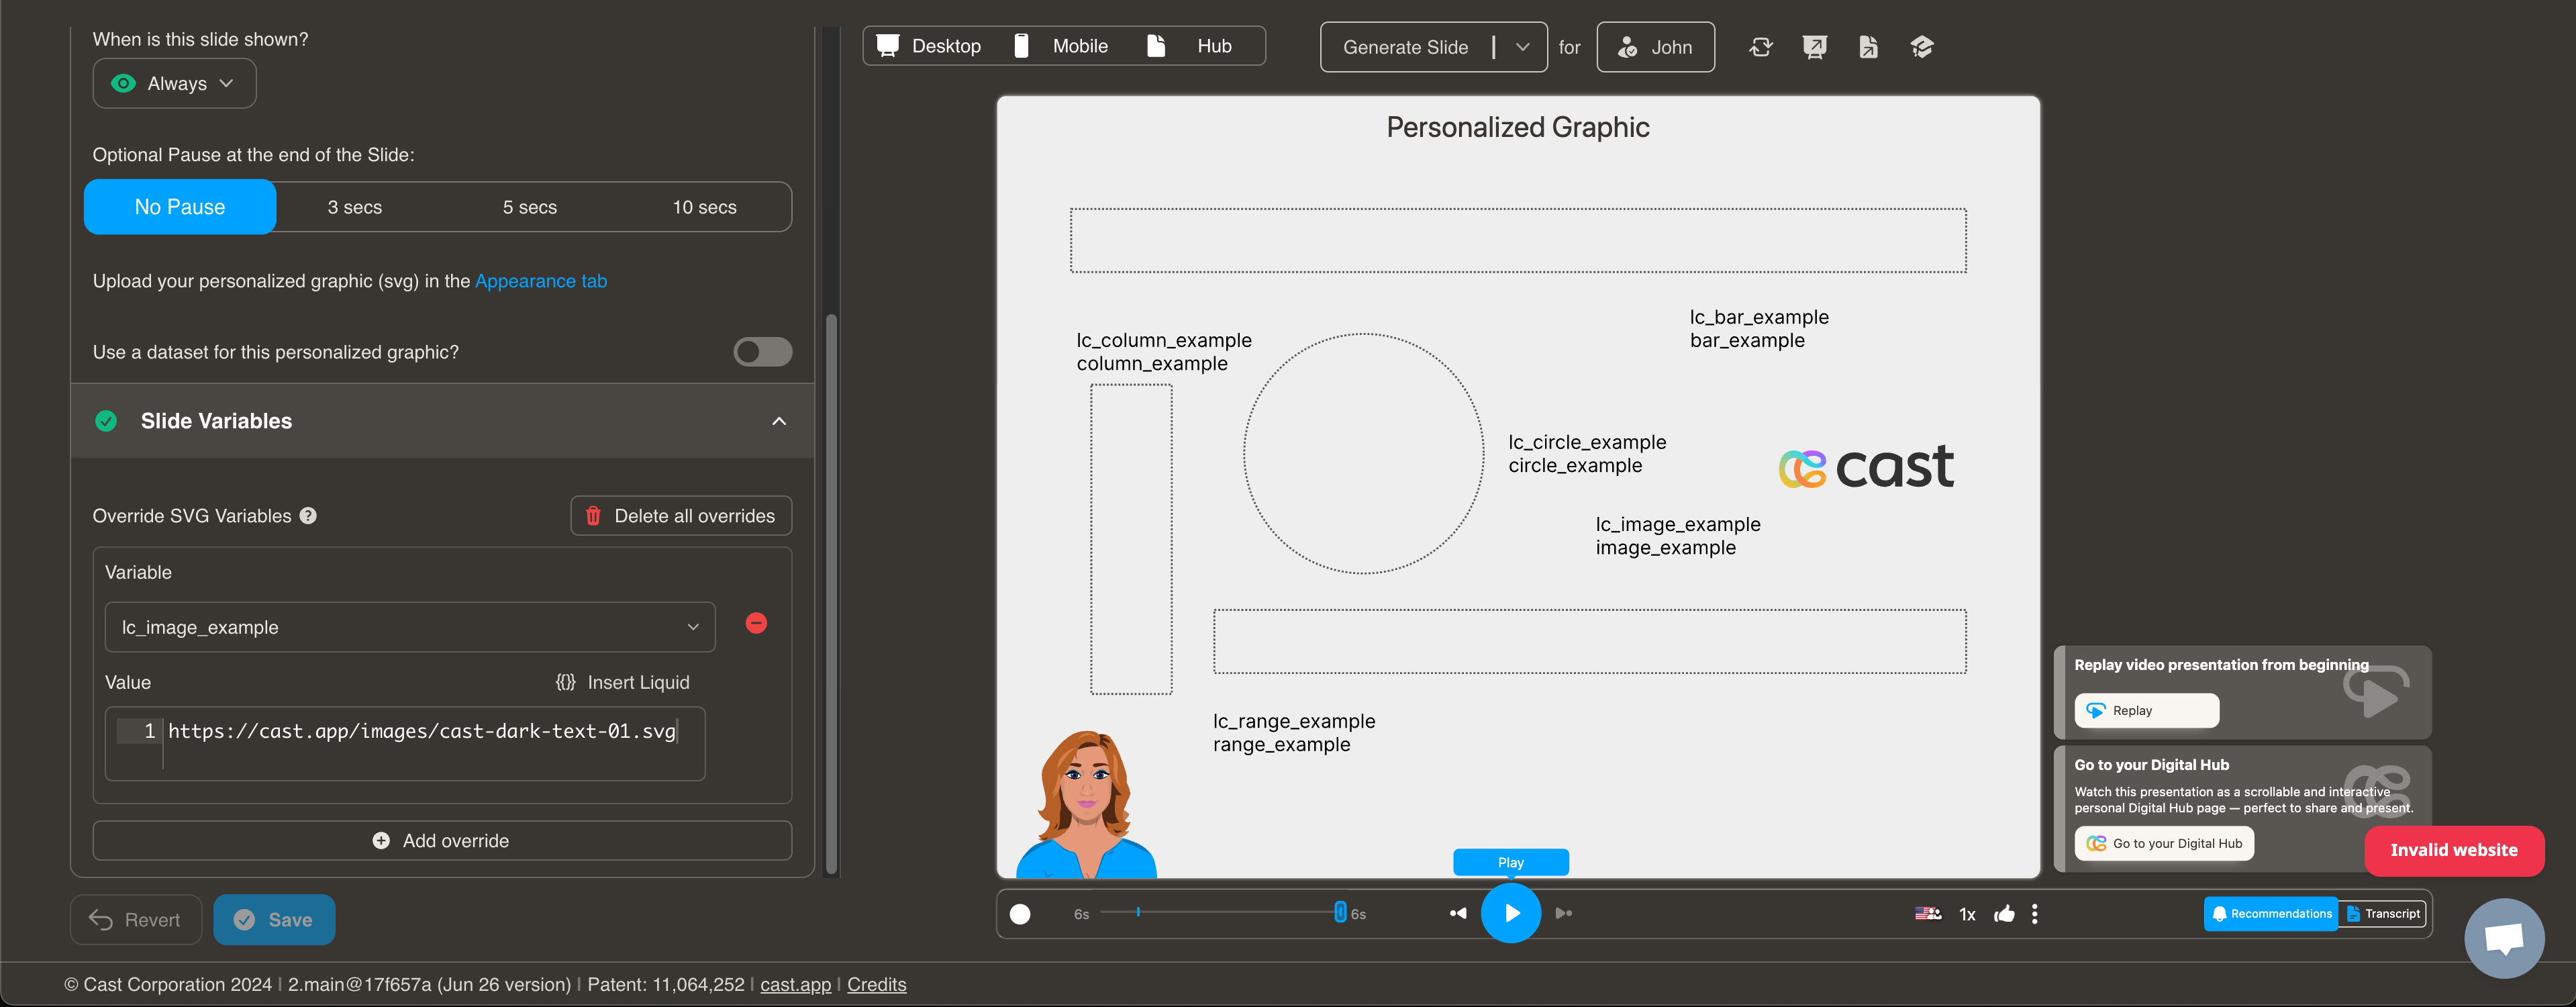
Dynamic Image Display with lc_image*
lc_image is used to dynamically display uploaded images.
Element Identification Identify the target element as an tag with an ID starting with lc_image.
Input Requirements The input value can be a direct CDN URL to the image or a dataset containing the image URL.
Error Management If no image is uploaded or an unsupported file type is selected, display a user-friendly message such as “No Image”.
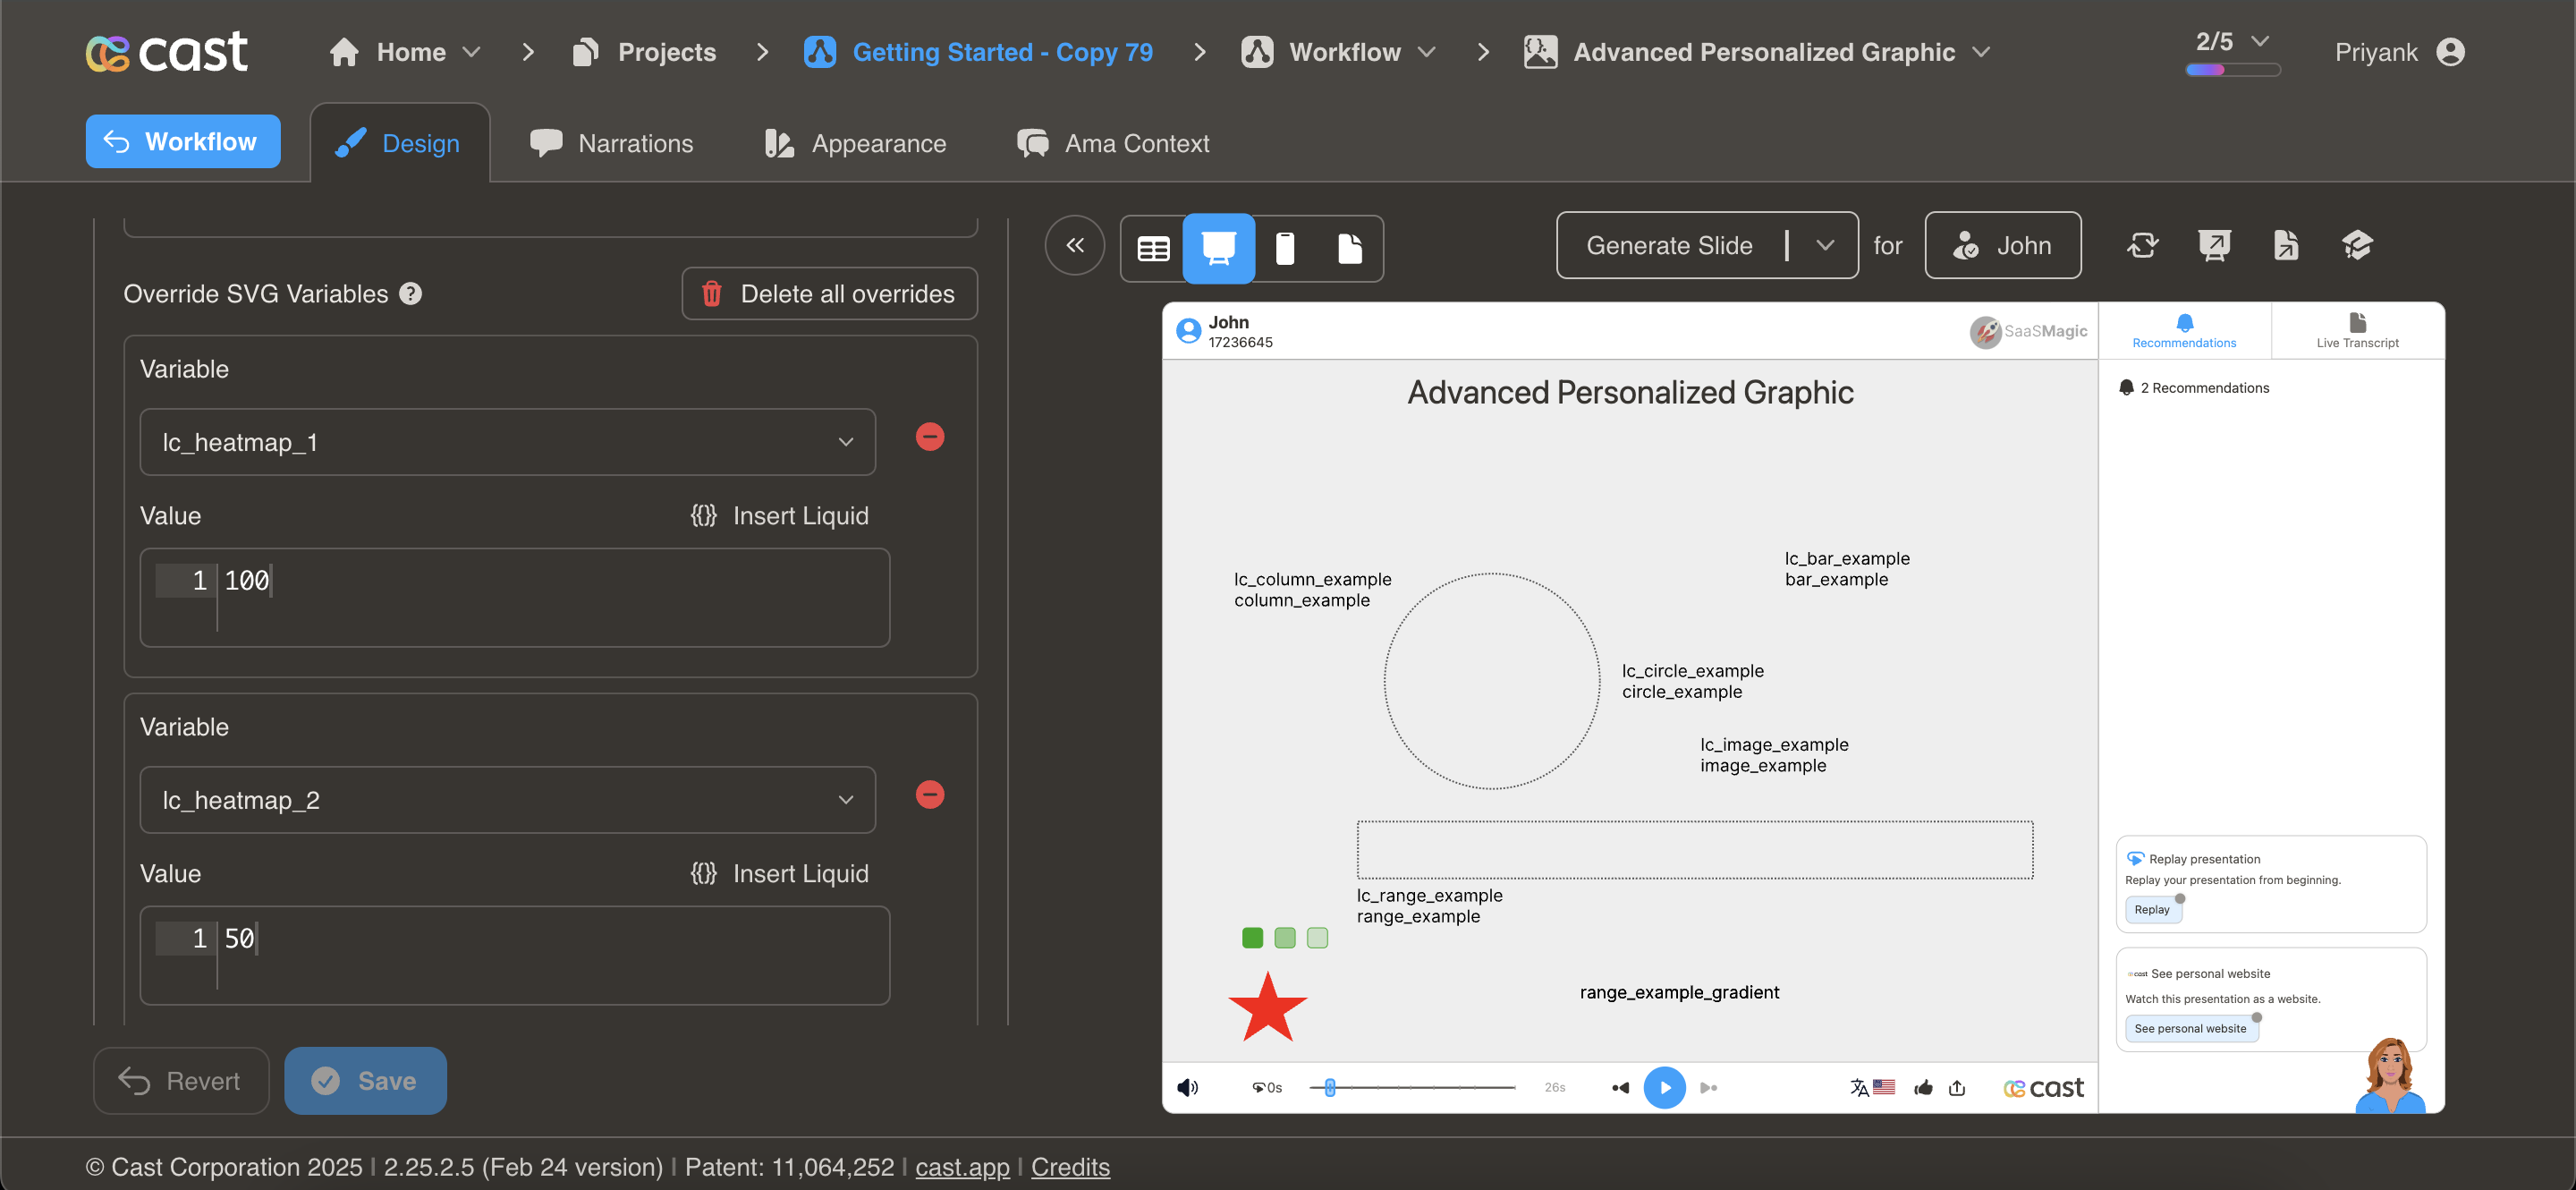
Dynamic Heatmap Customization with lc_heatmap_*
lc_heatmap is a prefix used for IDs of elements that need dynamic color intensity based on data values.
Heatmaps are ideal for visualizing:
- Performance metrics across different categories
- Engagement levels across different content pieces
- Comparison of values across time periods or regions
- Data density or concentration in specific areas
- Intensity of metrics like conversion rates, user activity, or satisfaction scores
Heatmaps make it easy to quickly identify high and low values in a dataset through color gradients.
Element Identification Identify the target element as an <img> tag with an ID starting with lc_heatmap_*
Input Format:
The element accepts any value between 0 and 100. If a value greater than 100 is provided, it will be treated as 100 (full).
Dynamic Color Customization with lc_color_* and
lc_color is a prefix used for IDs of elements that need dynamic color adjustments based on specific values or conditions.
- Status indicators (success, warning, error, neutral states)
- Data-driven color changes (profit/loss indicators, performance status)
- Highlight specific elements to draw attention
- Color-coding categories or segments in reports and dashboards
Element Identification
Identify the target element as an <img> tag with an ID starting with lc_color_*
Input Format:
The input value should be a valid color code in hex format or a named CSS color. Example: “#2196F3” or “royalblue”